


In my previous tutorial, I taught you how to use Docker to spin up a local DynamoDb. Using a local DynamoDb can be tricky to manage because there is no default utility to manage the database tables. Today, I am going to show you use to use AWS NoSQL Workbench to manage your local DynamoDb.
Prerequisite
Download and install AWS NoSQL Workbench.
Using NoSQL Workbench
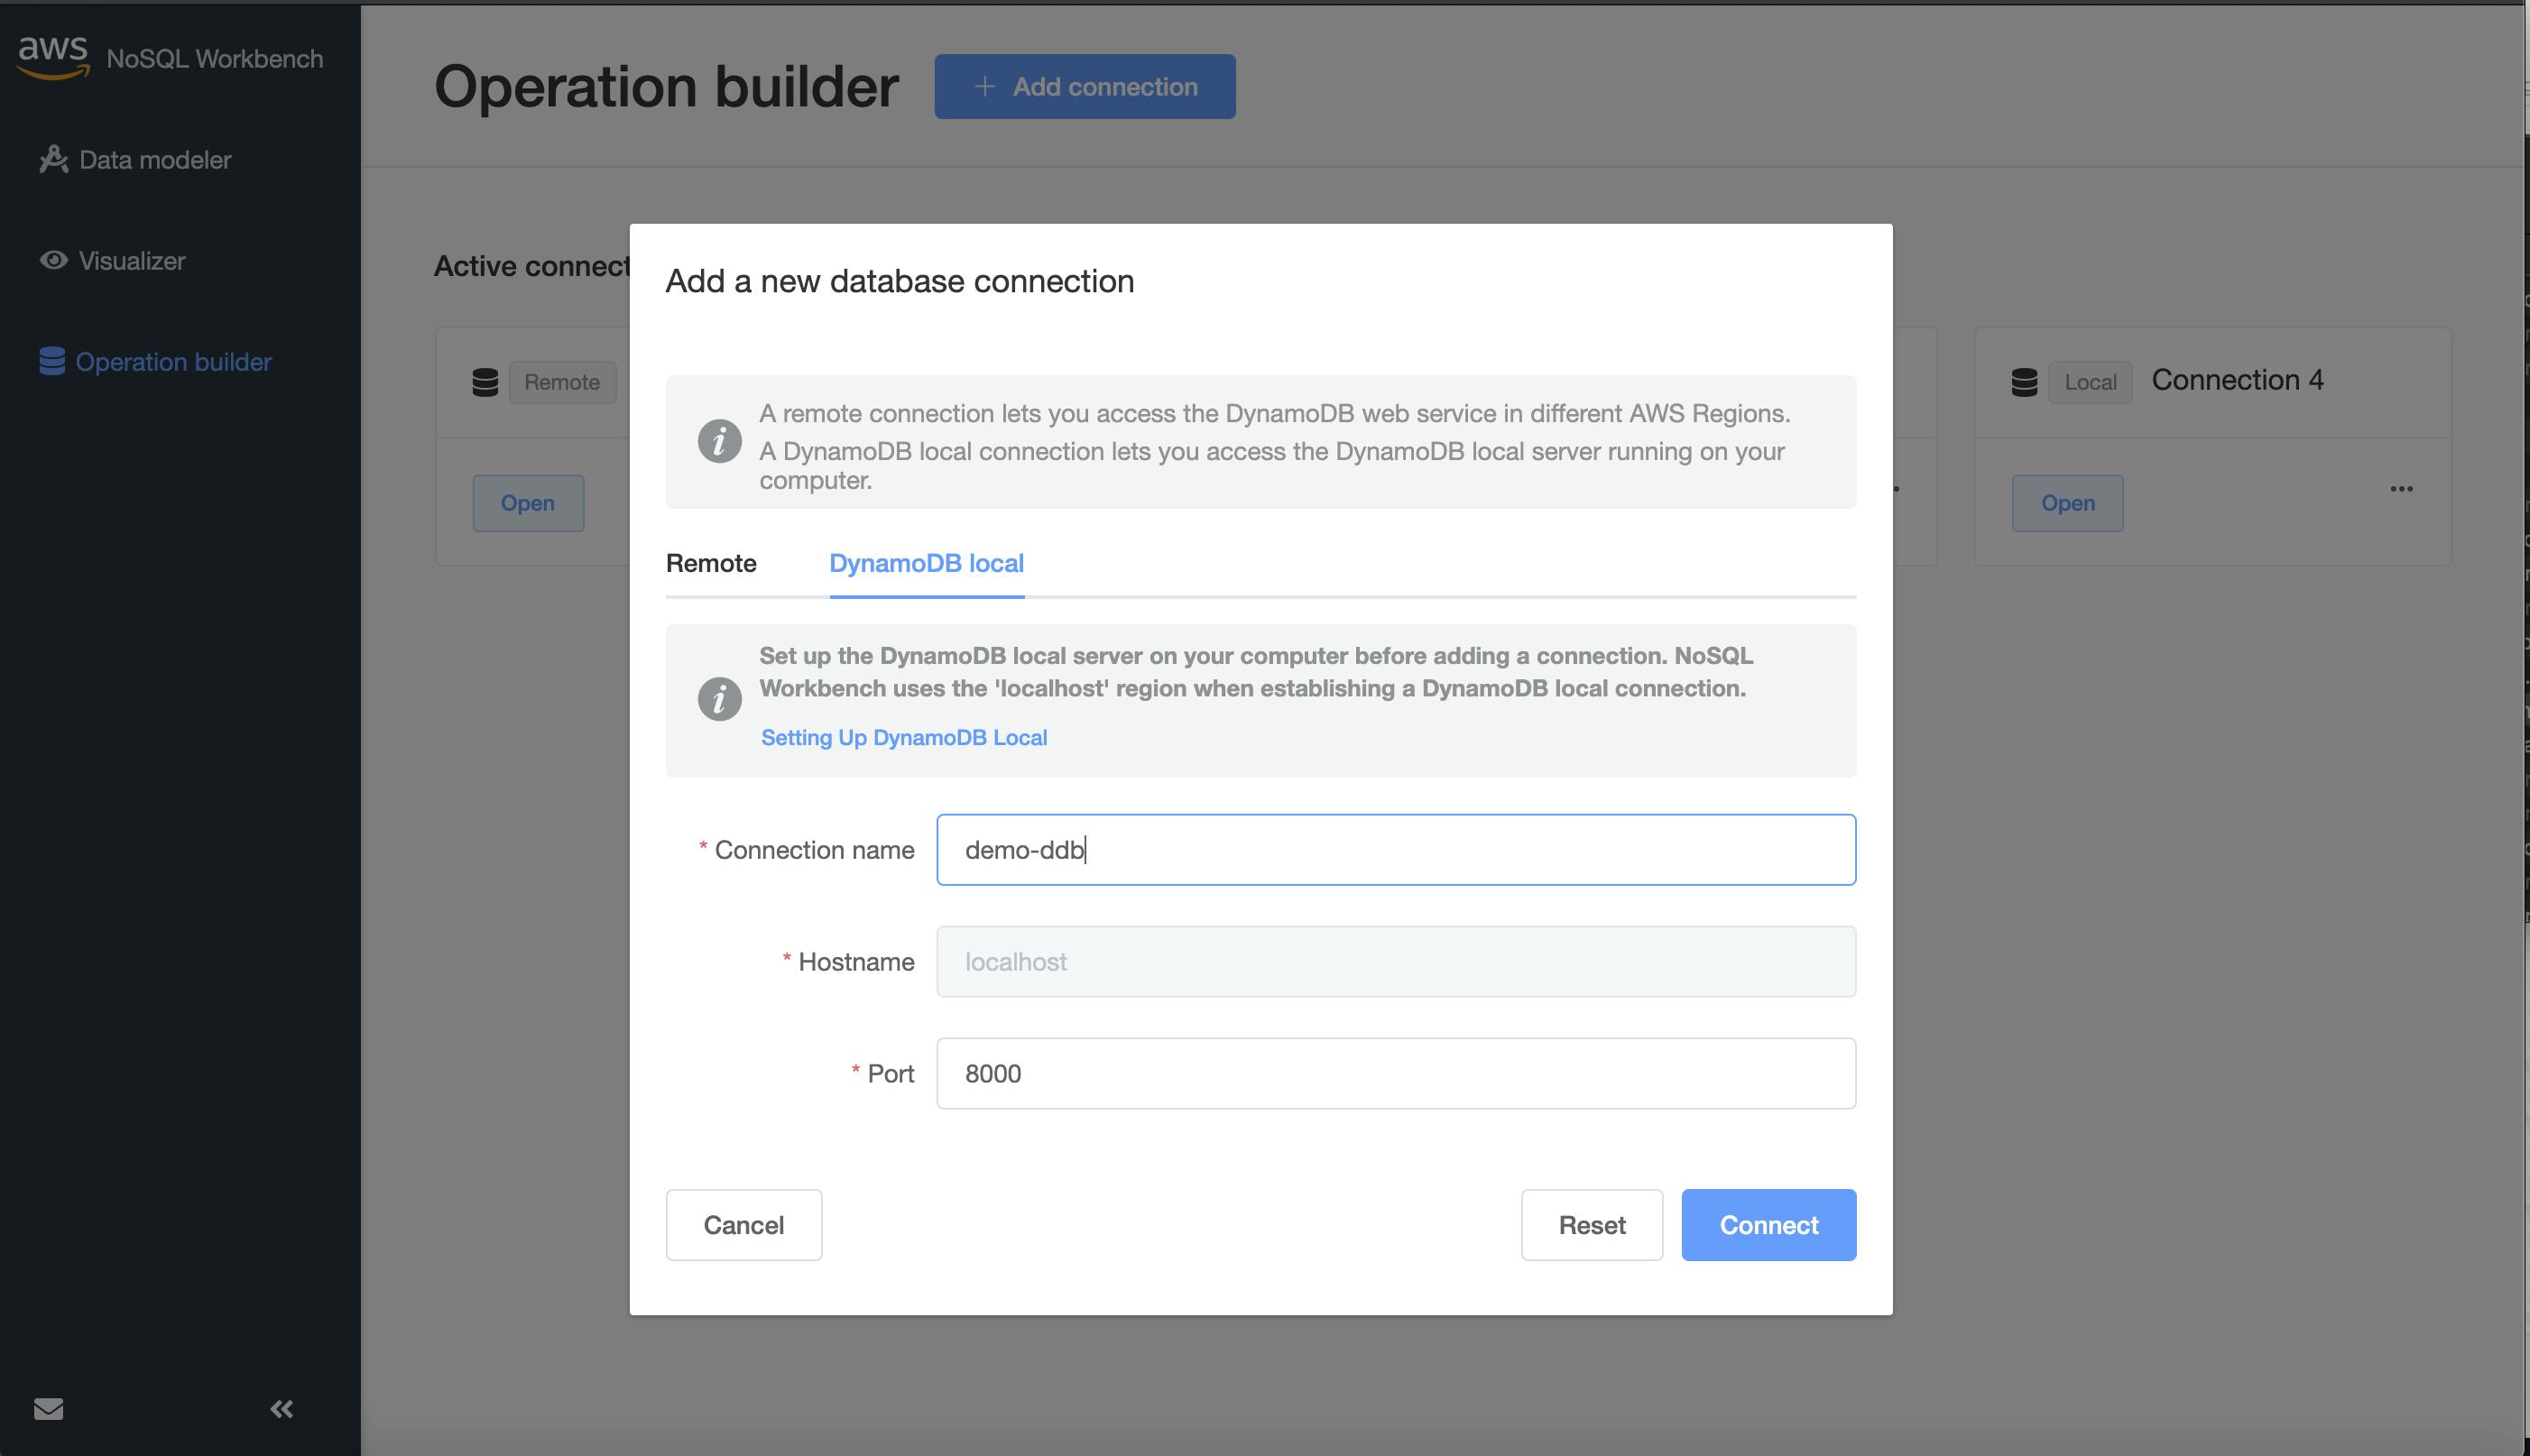
Add a new database connection.
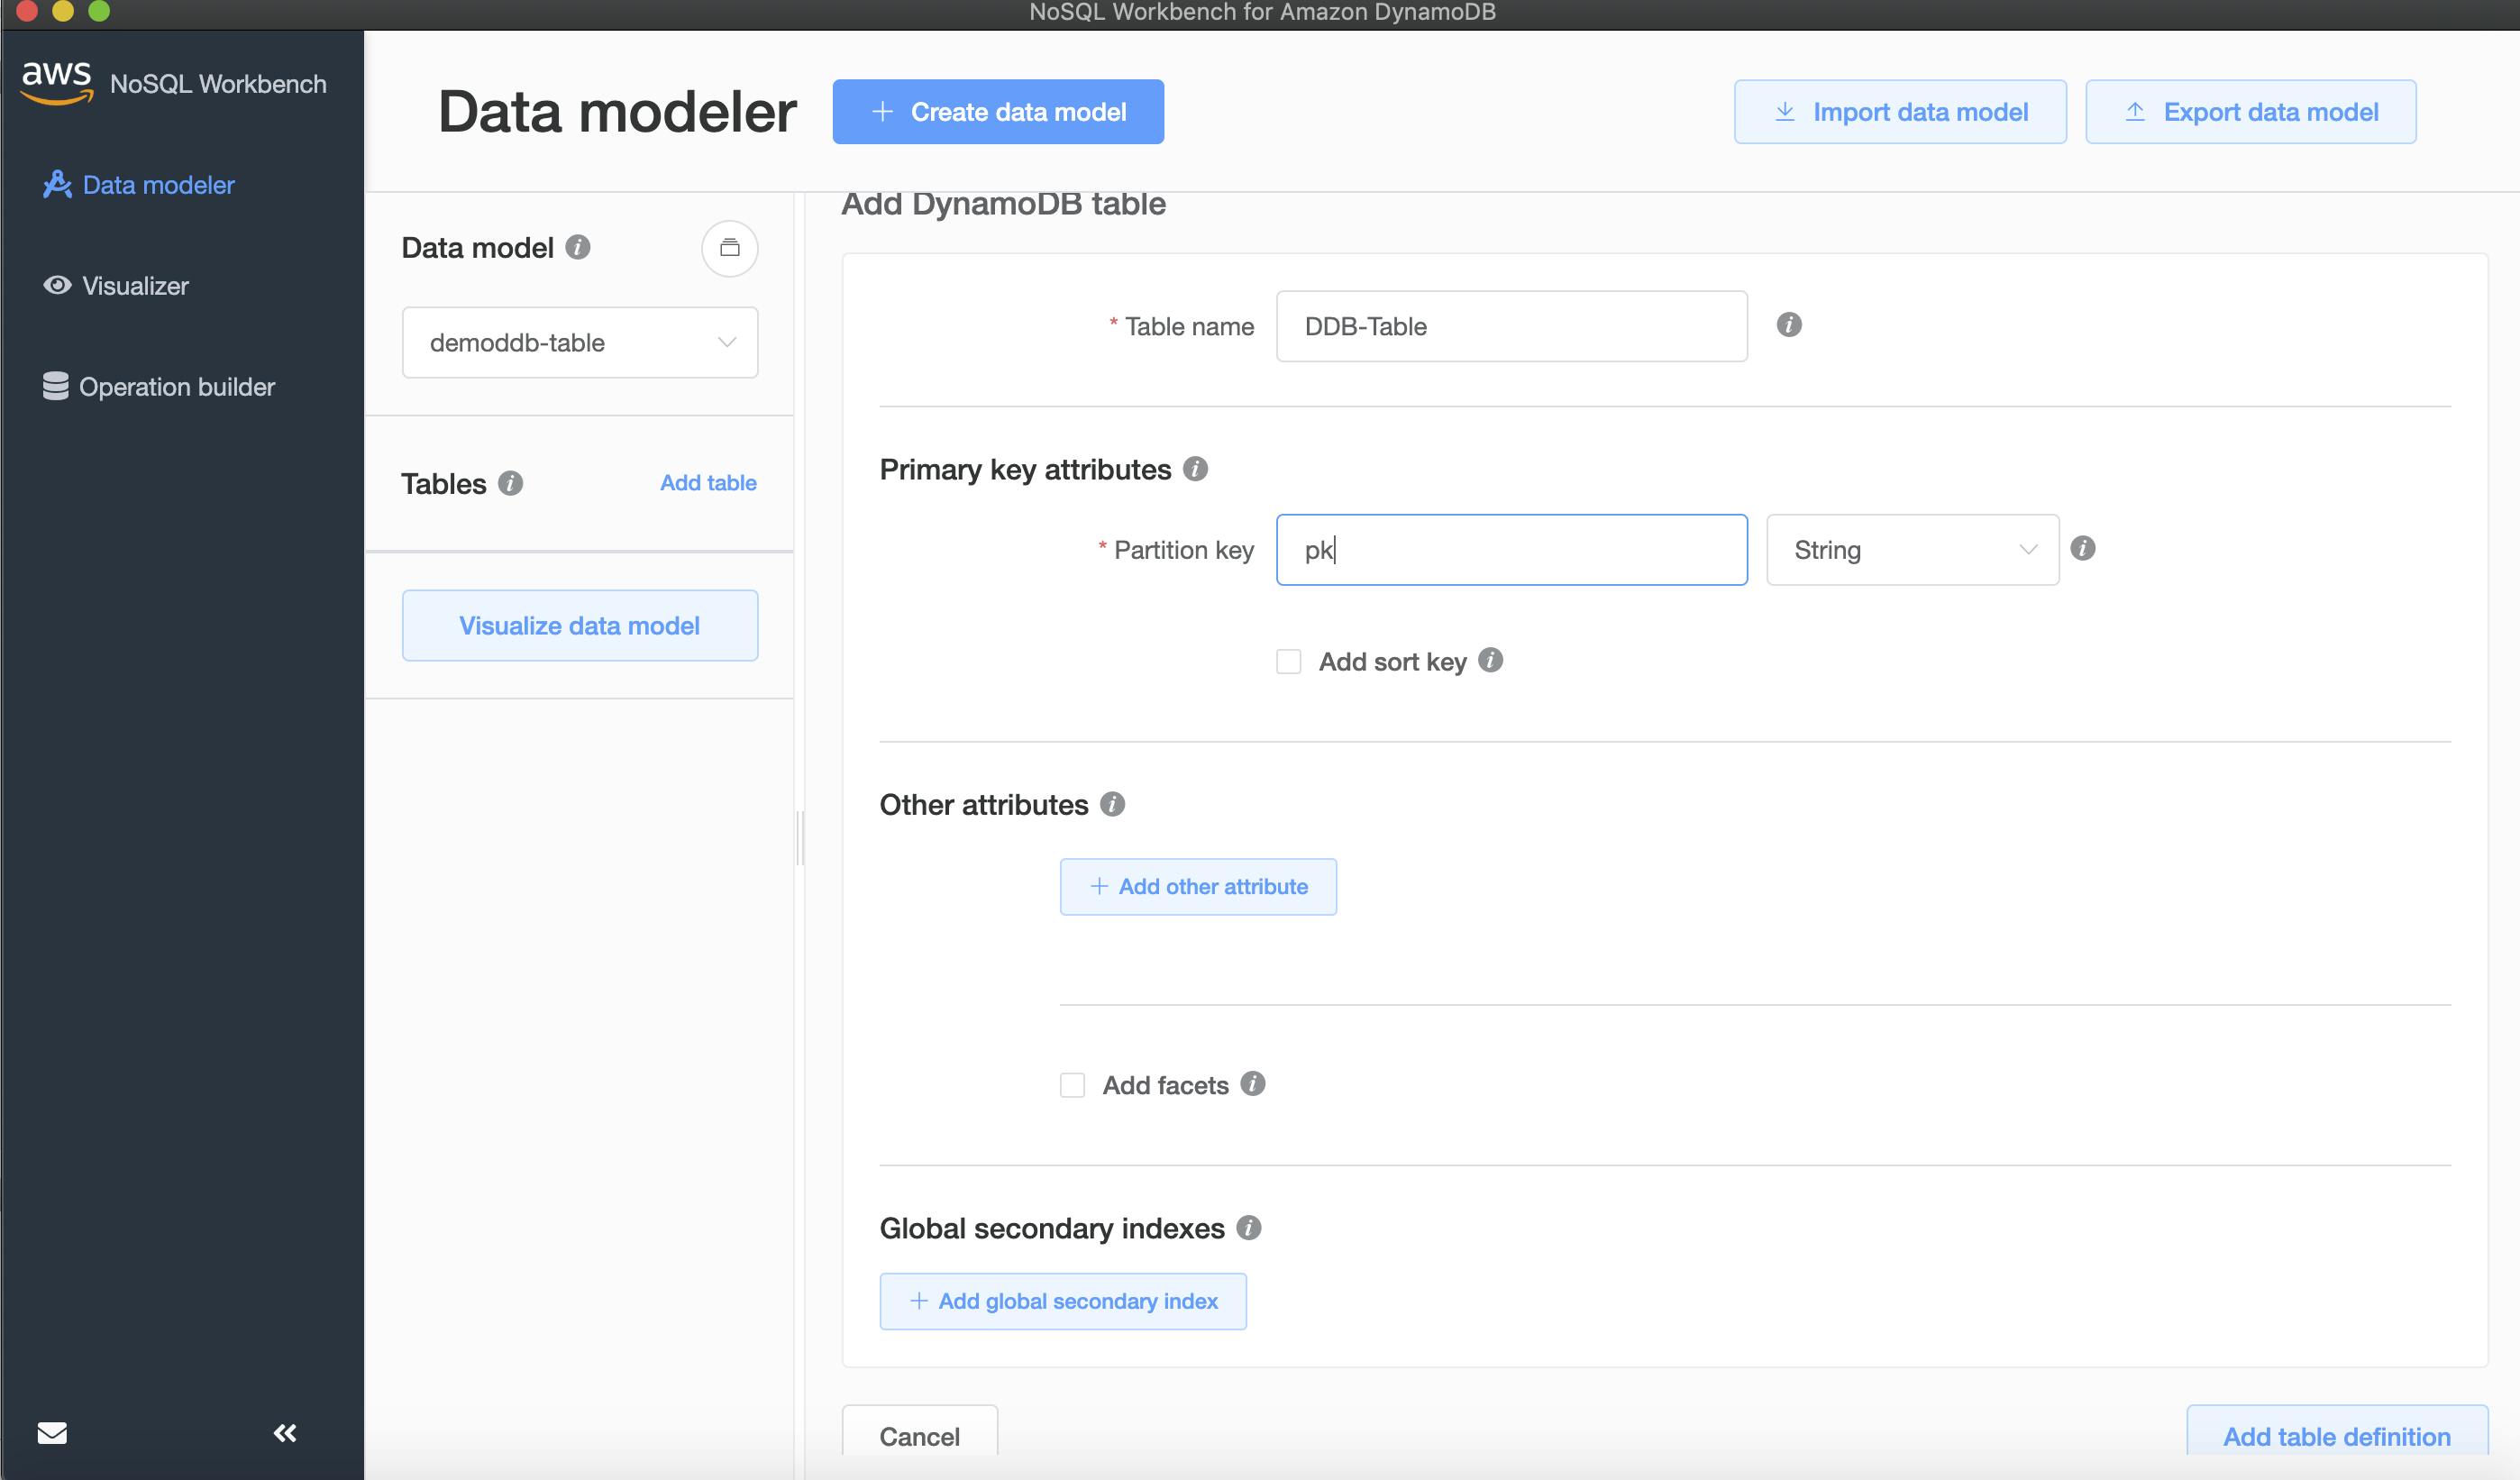
Click "Data Modeler". Then let's create a data model for the database.

Create a table.
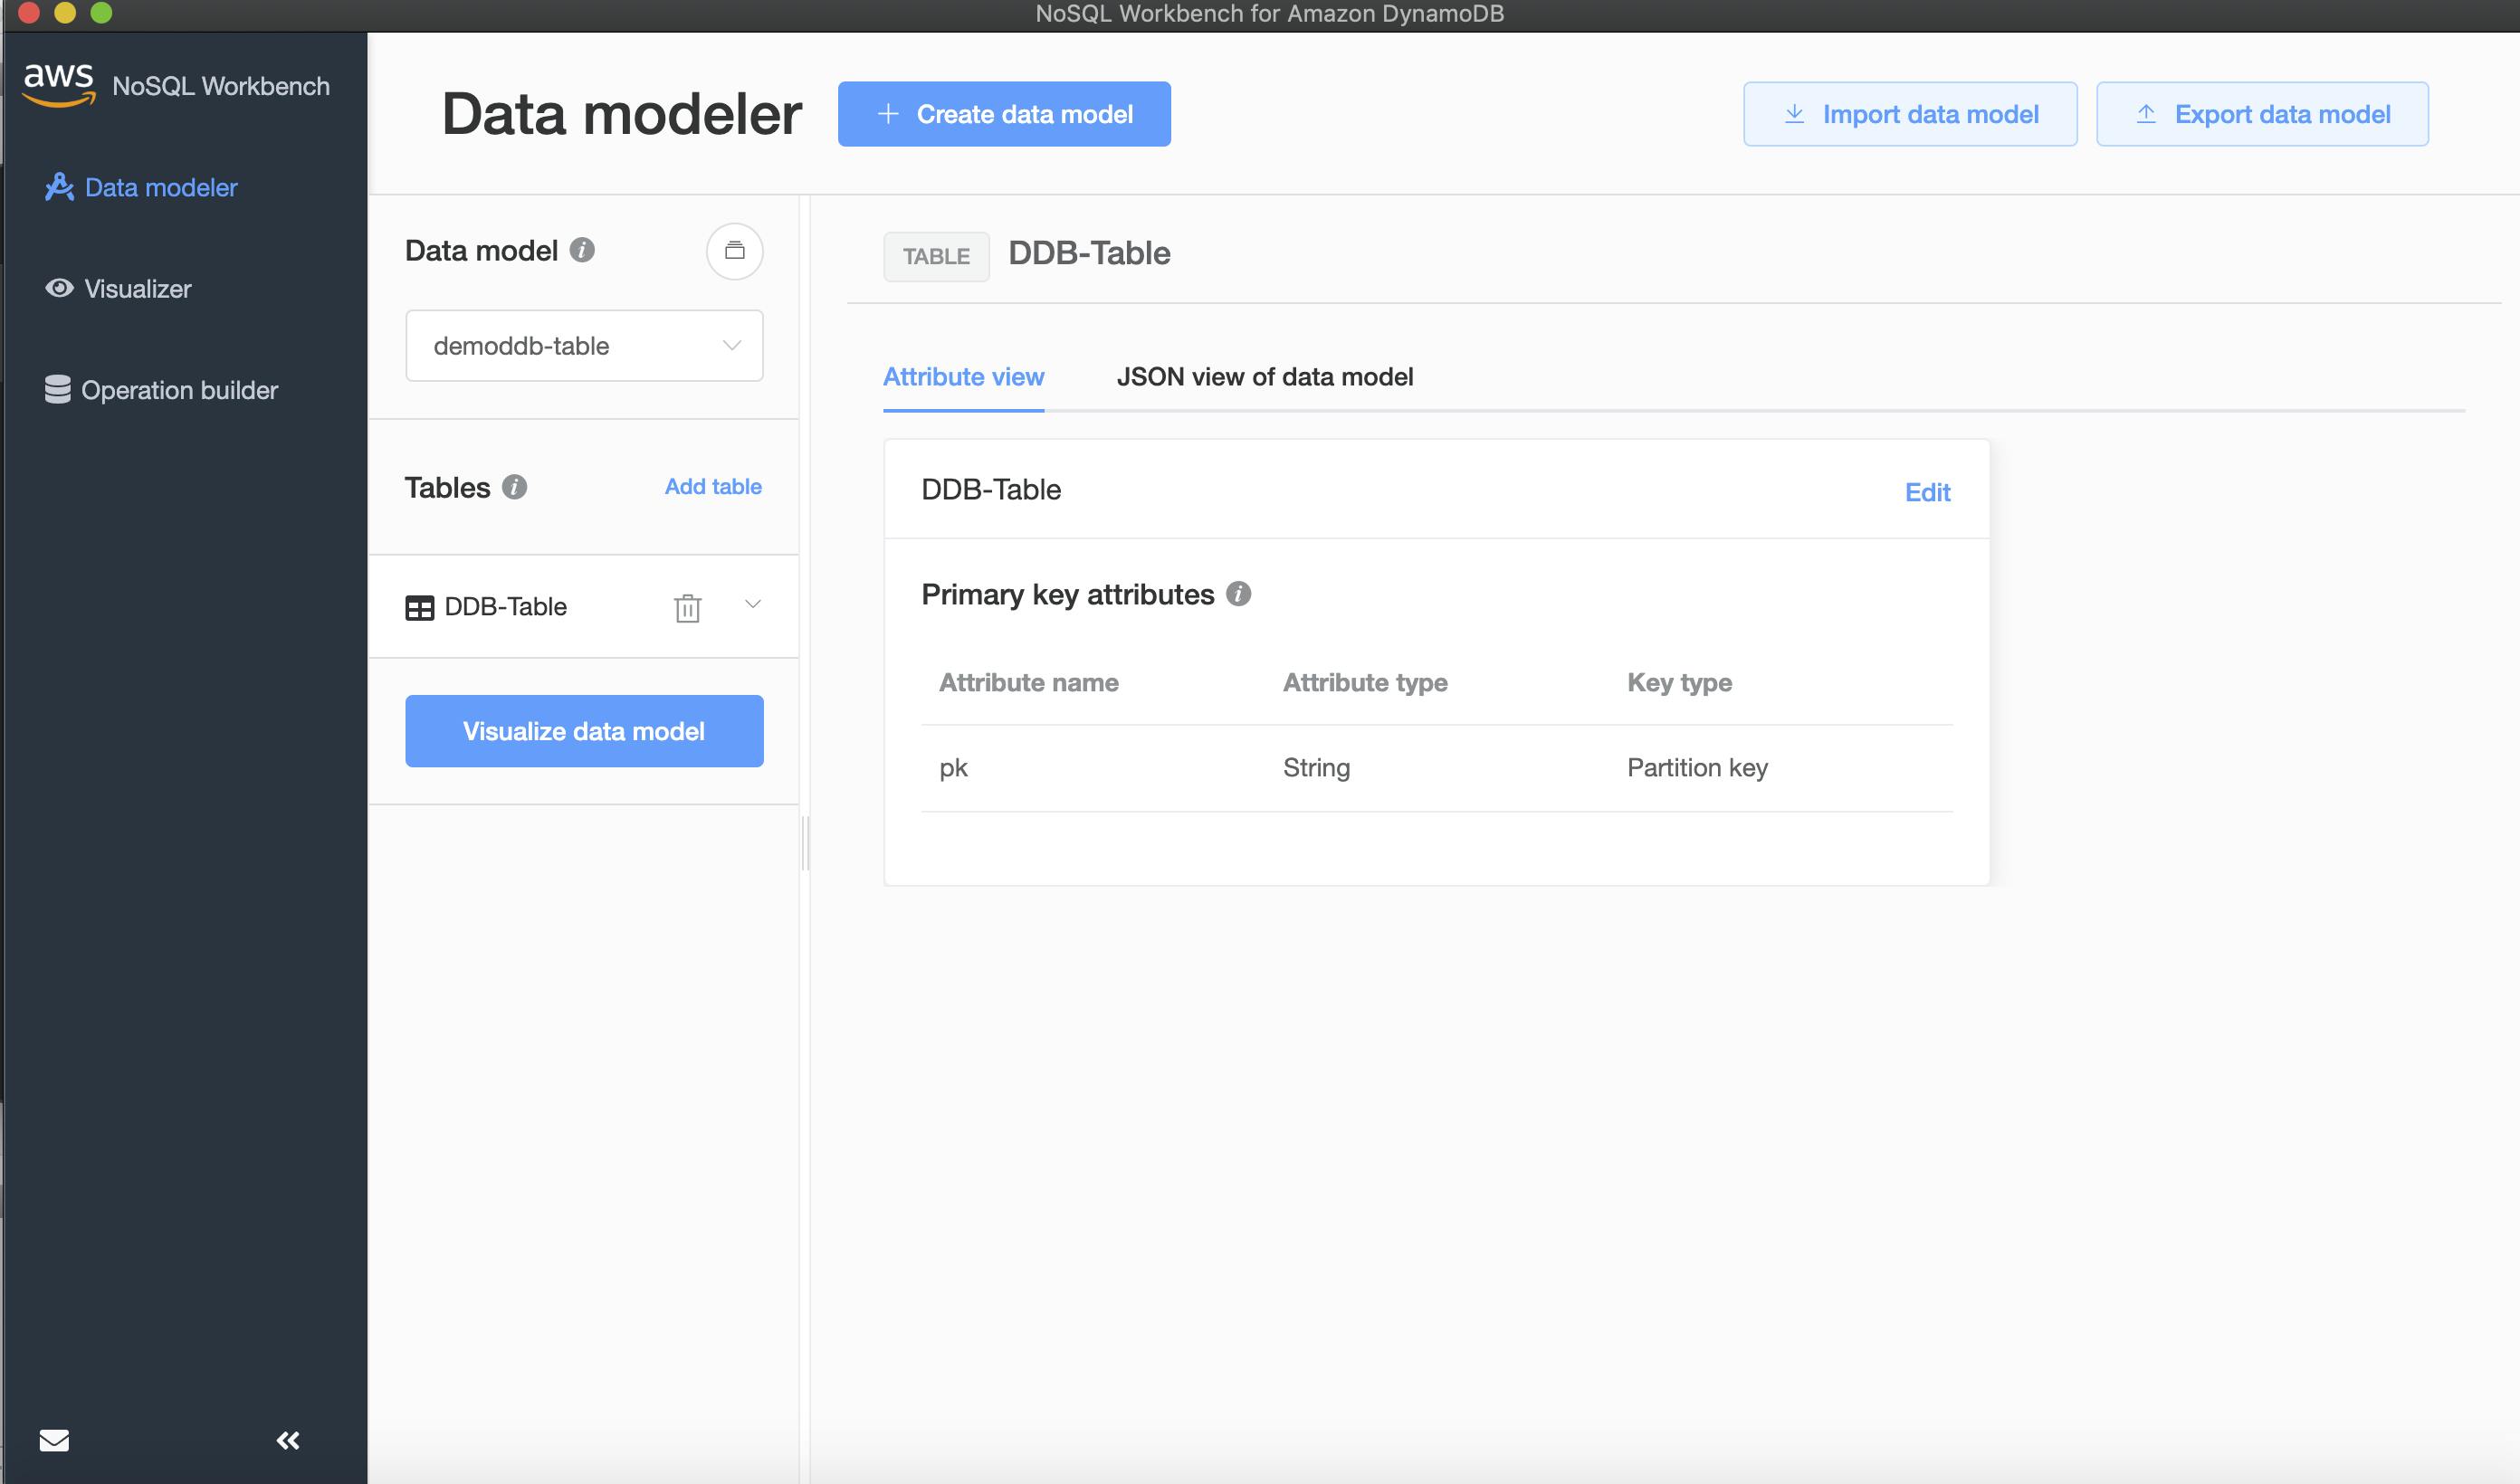
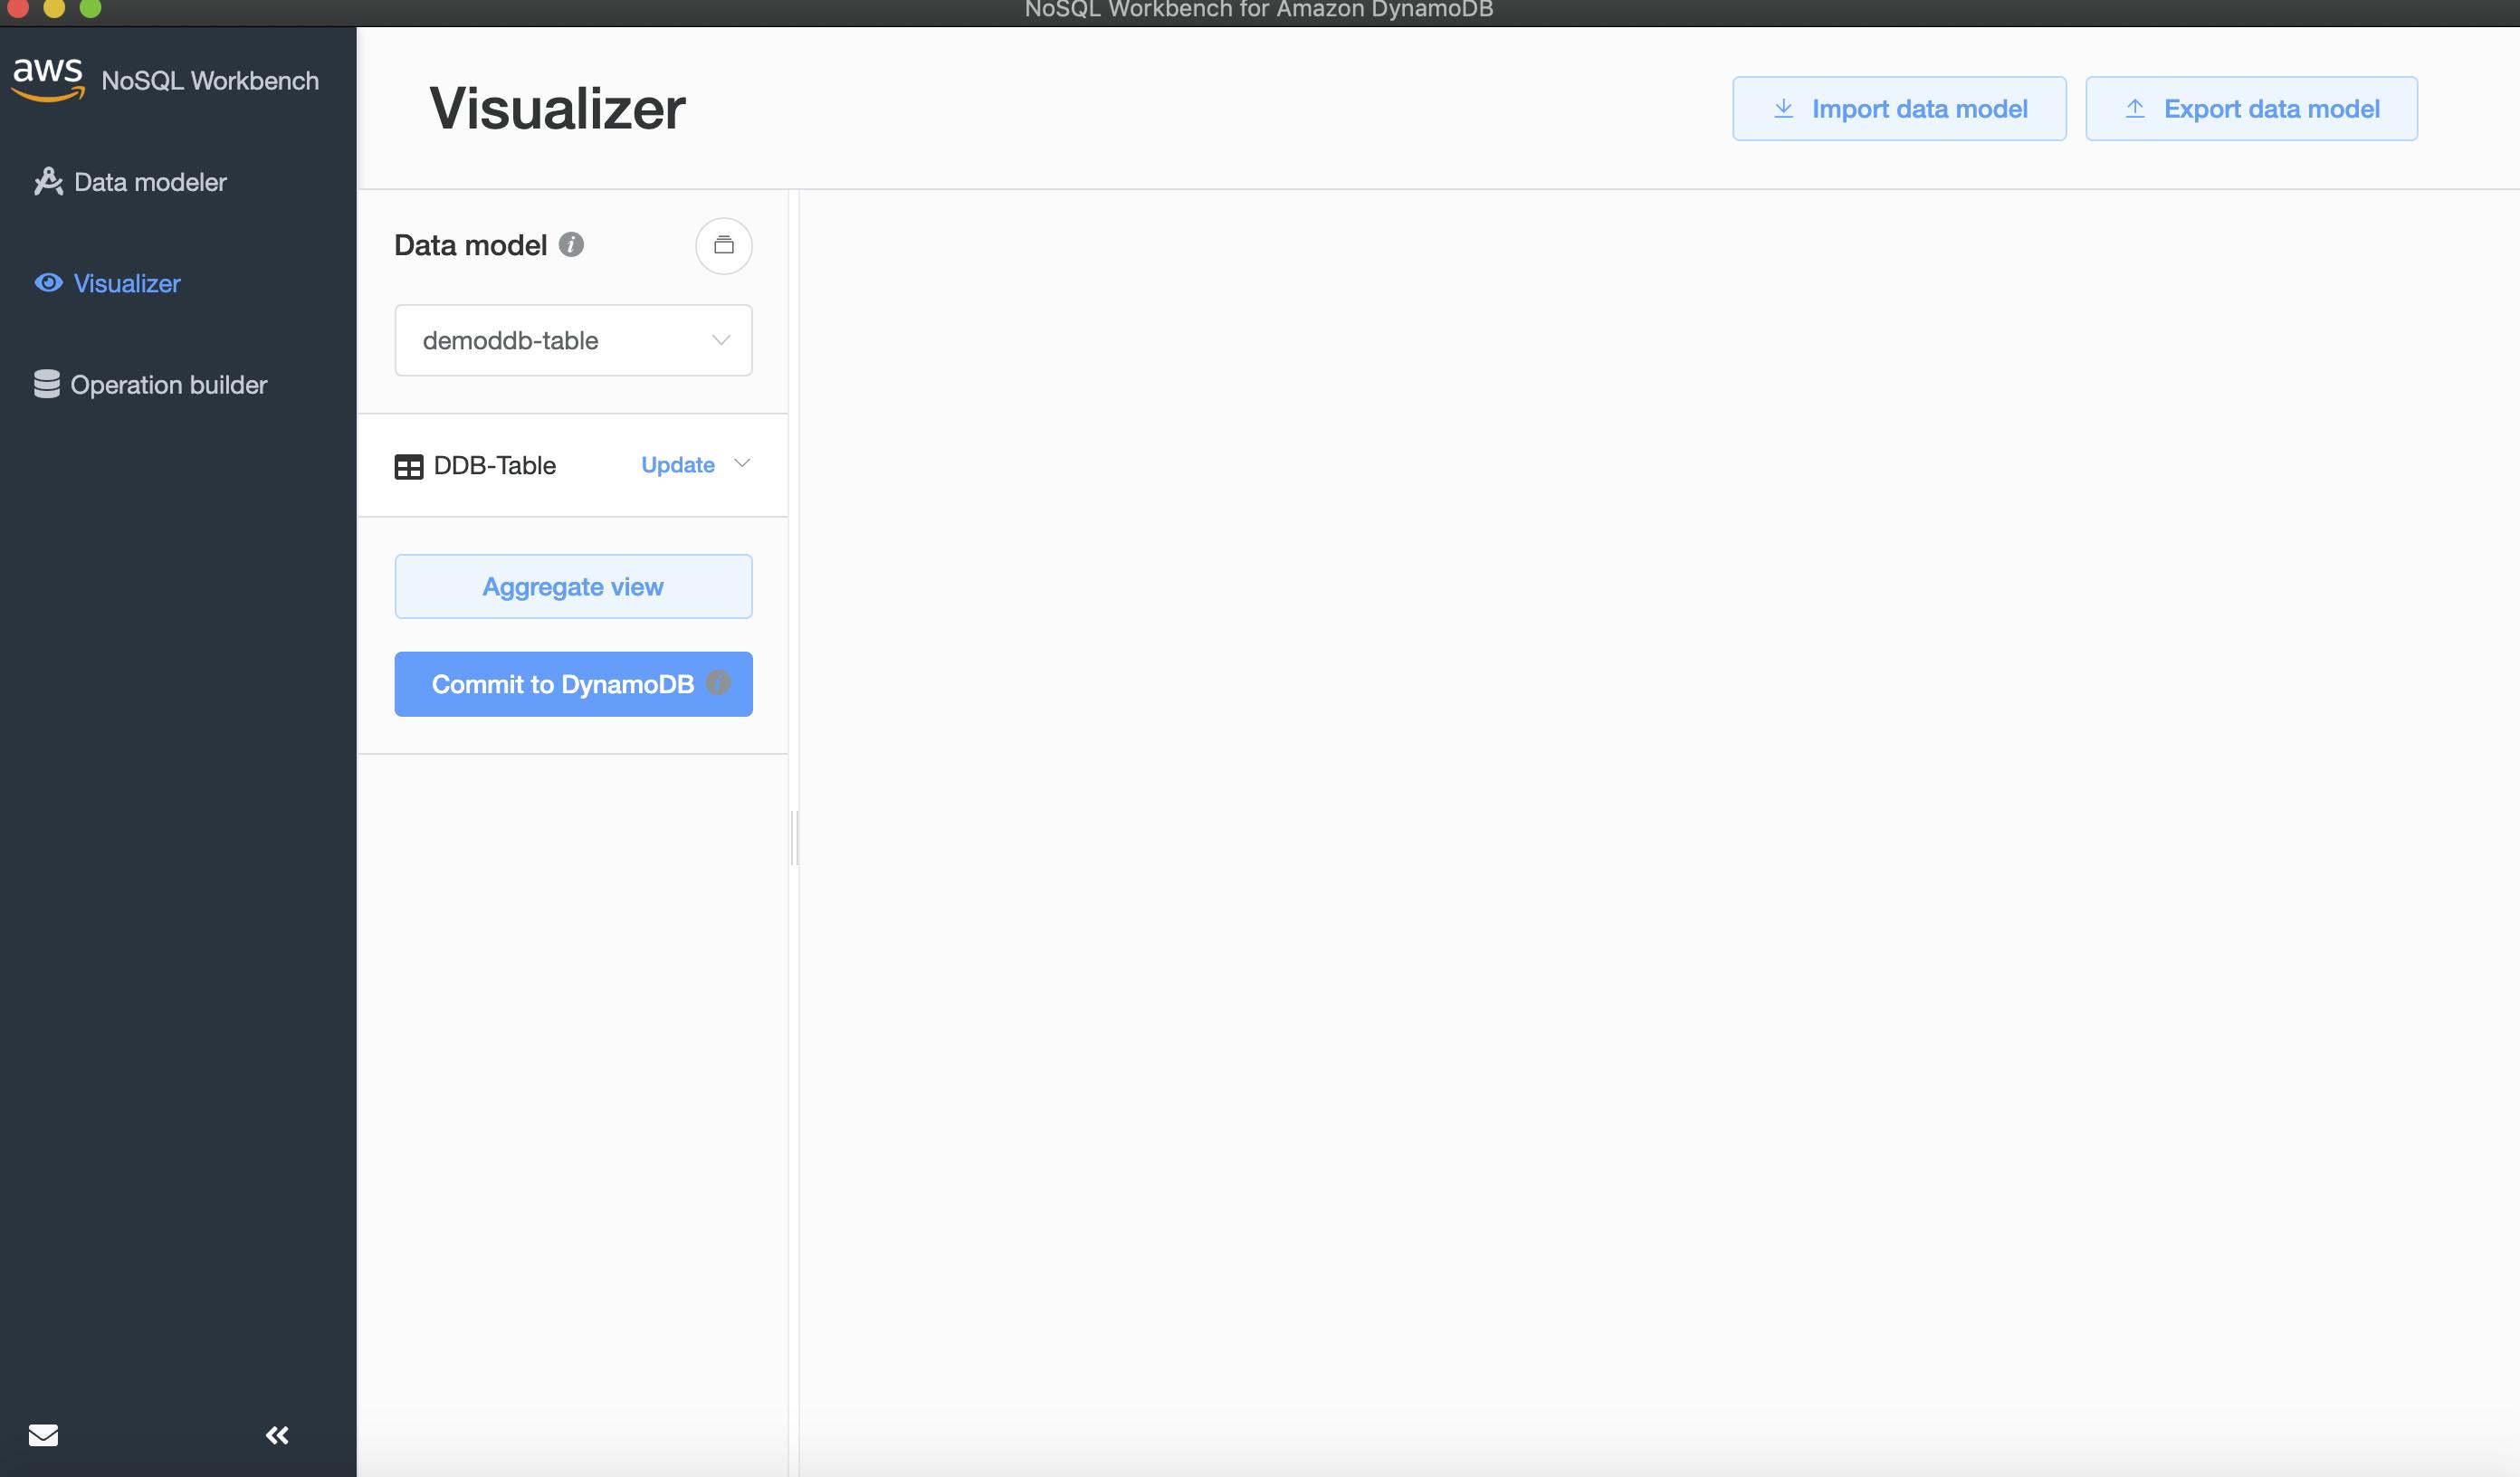
Click "Visualize data model".
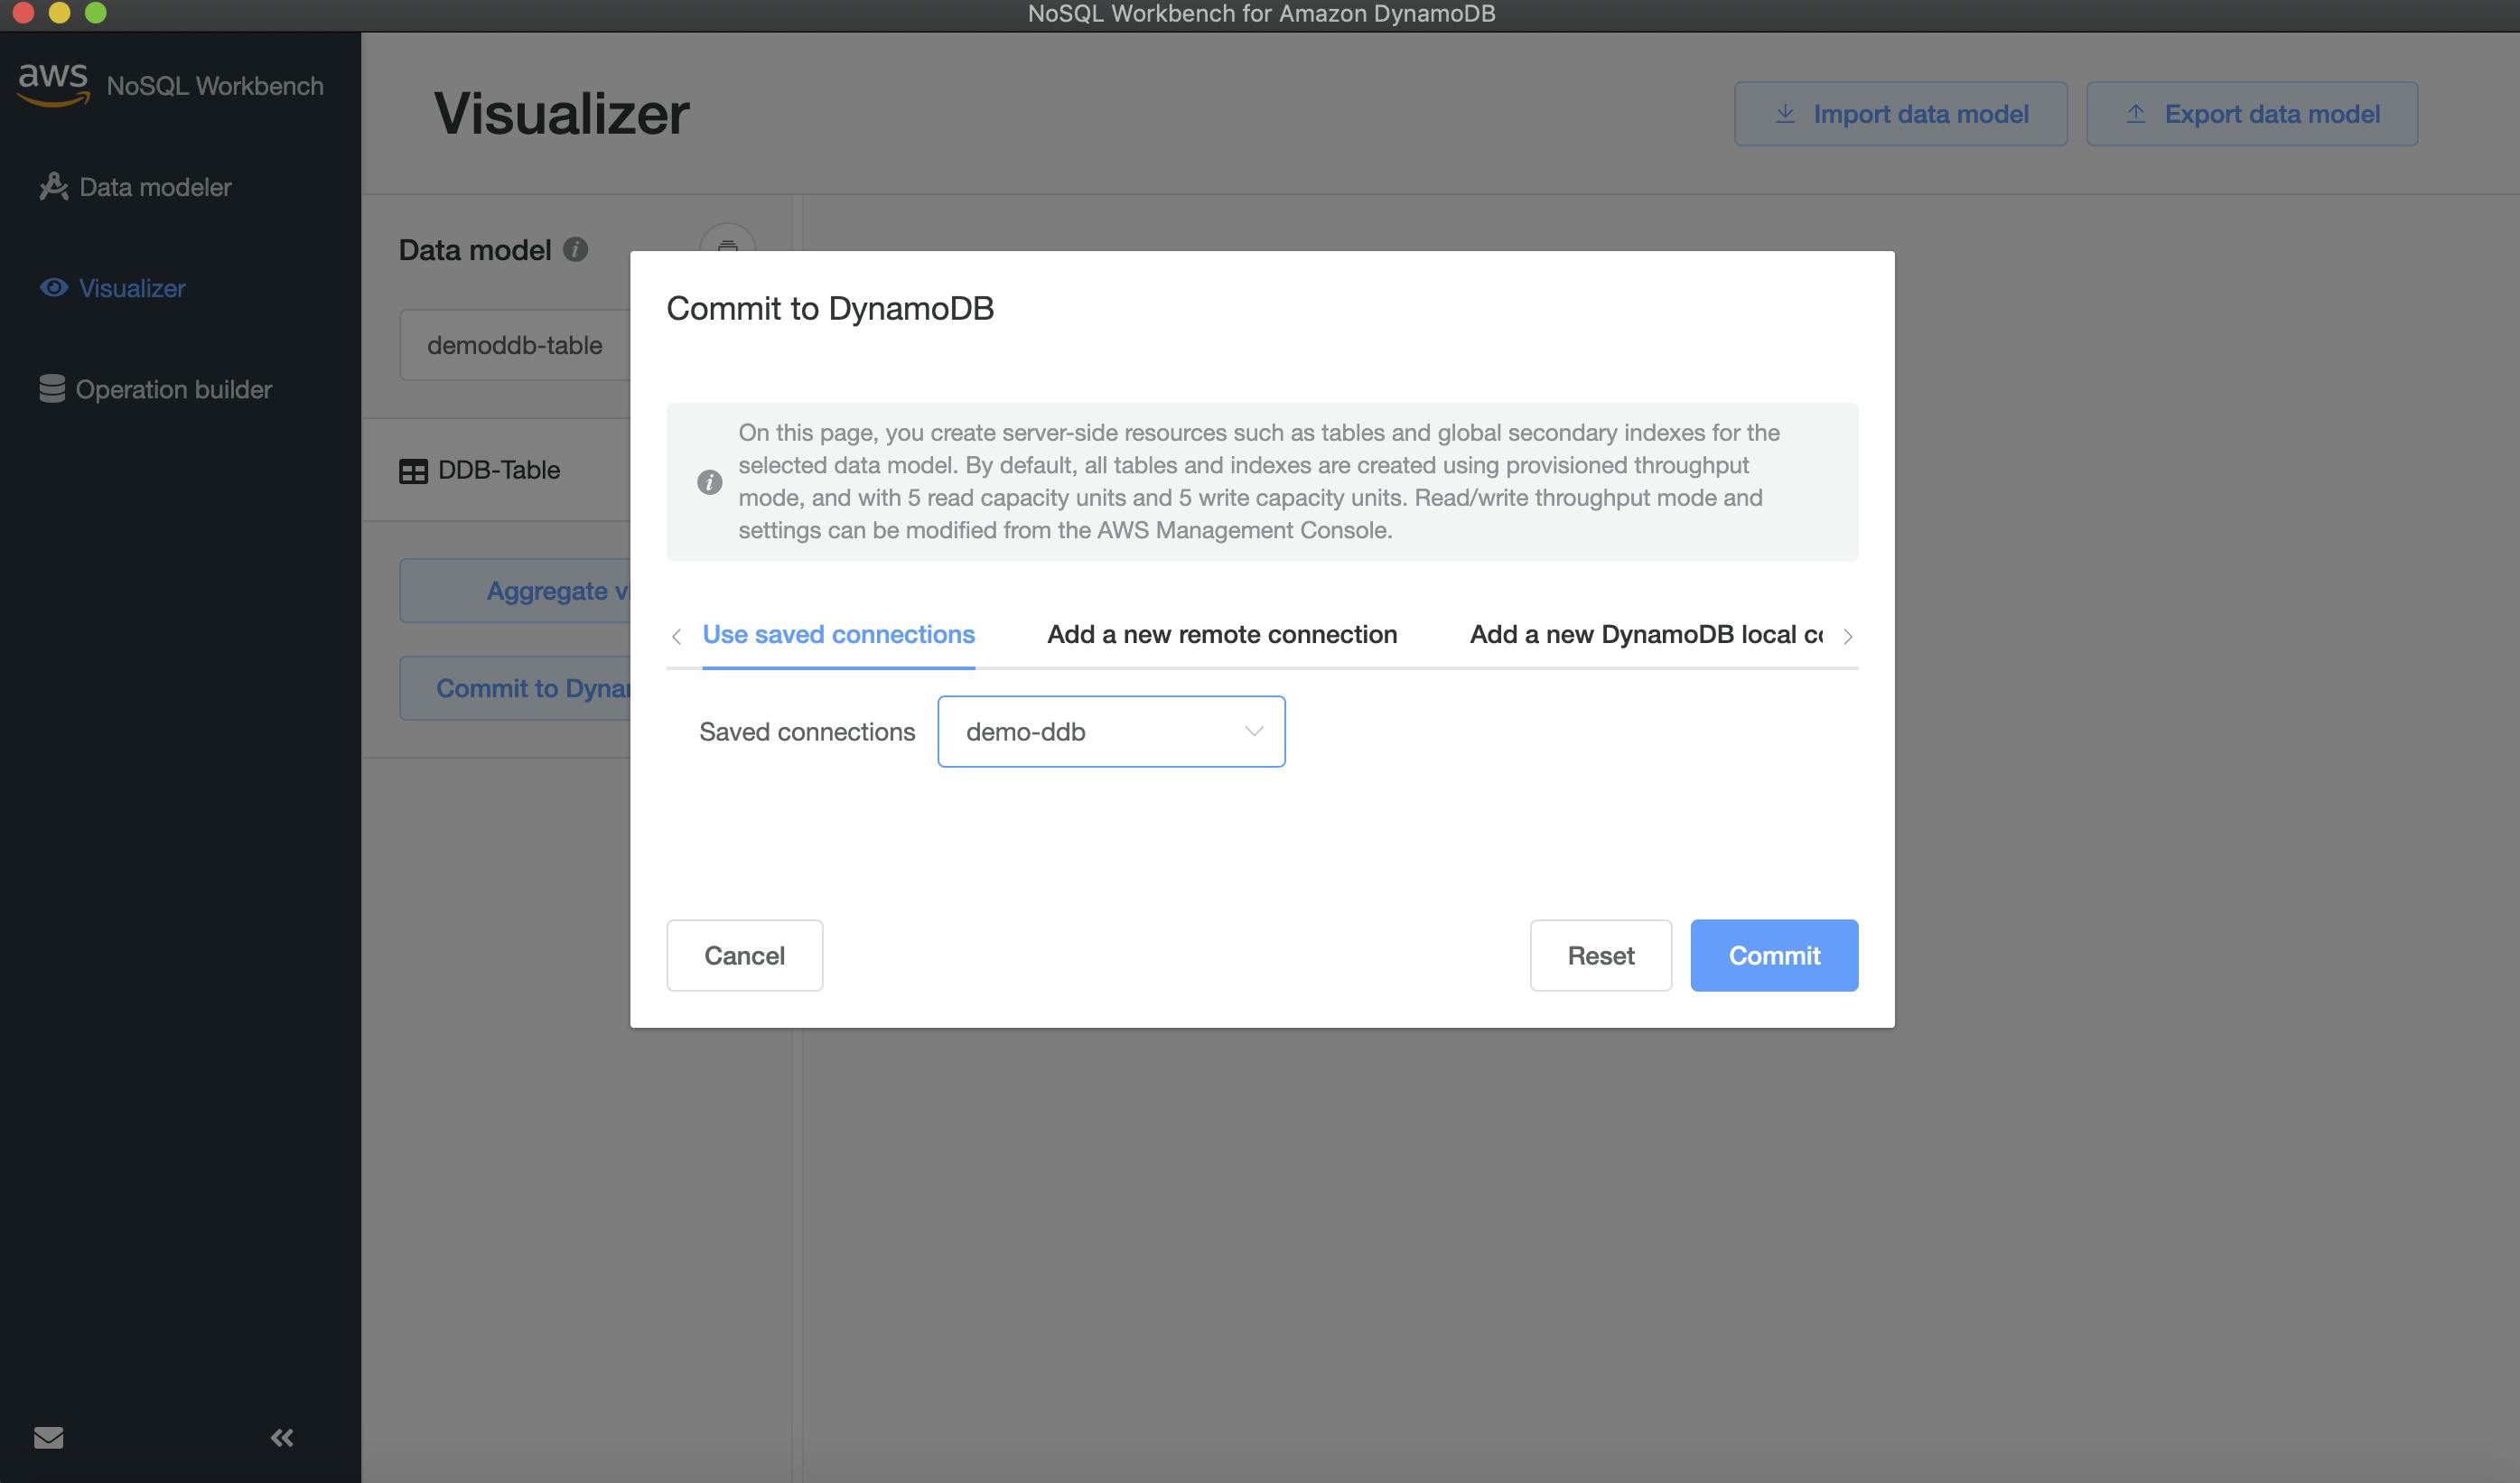
Commit the model to your local database.
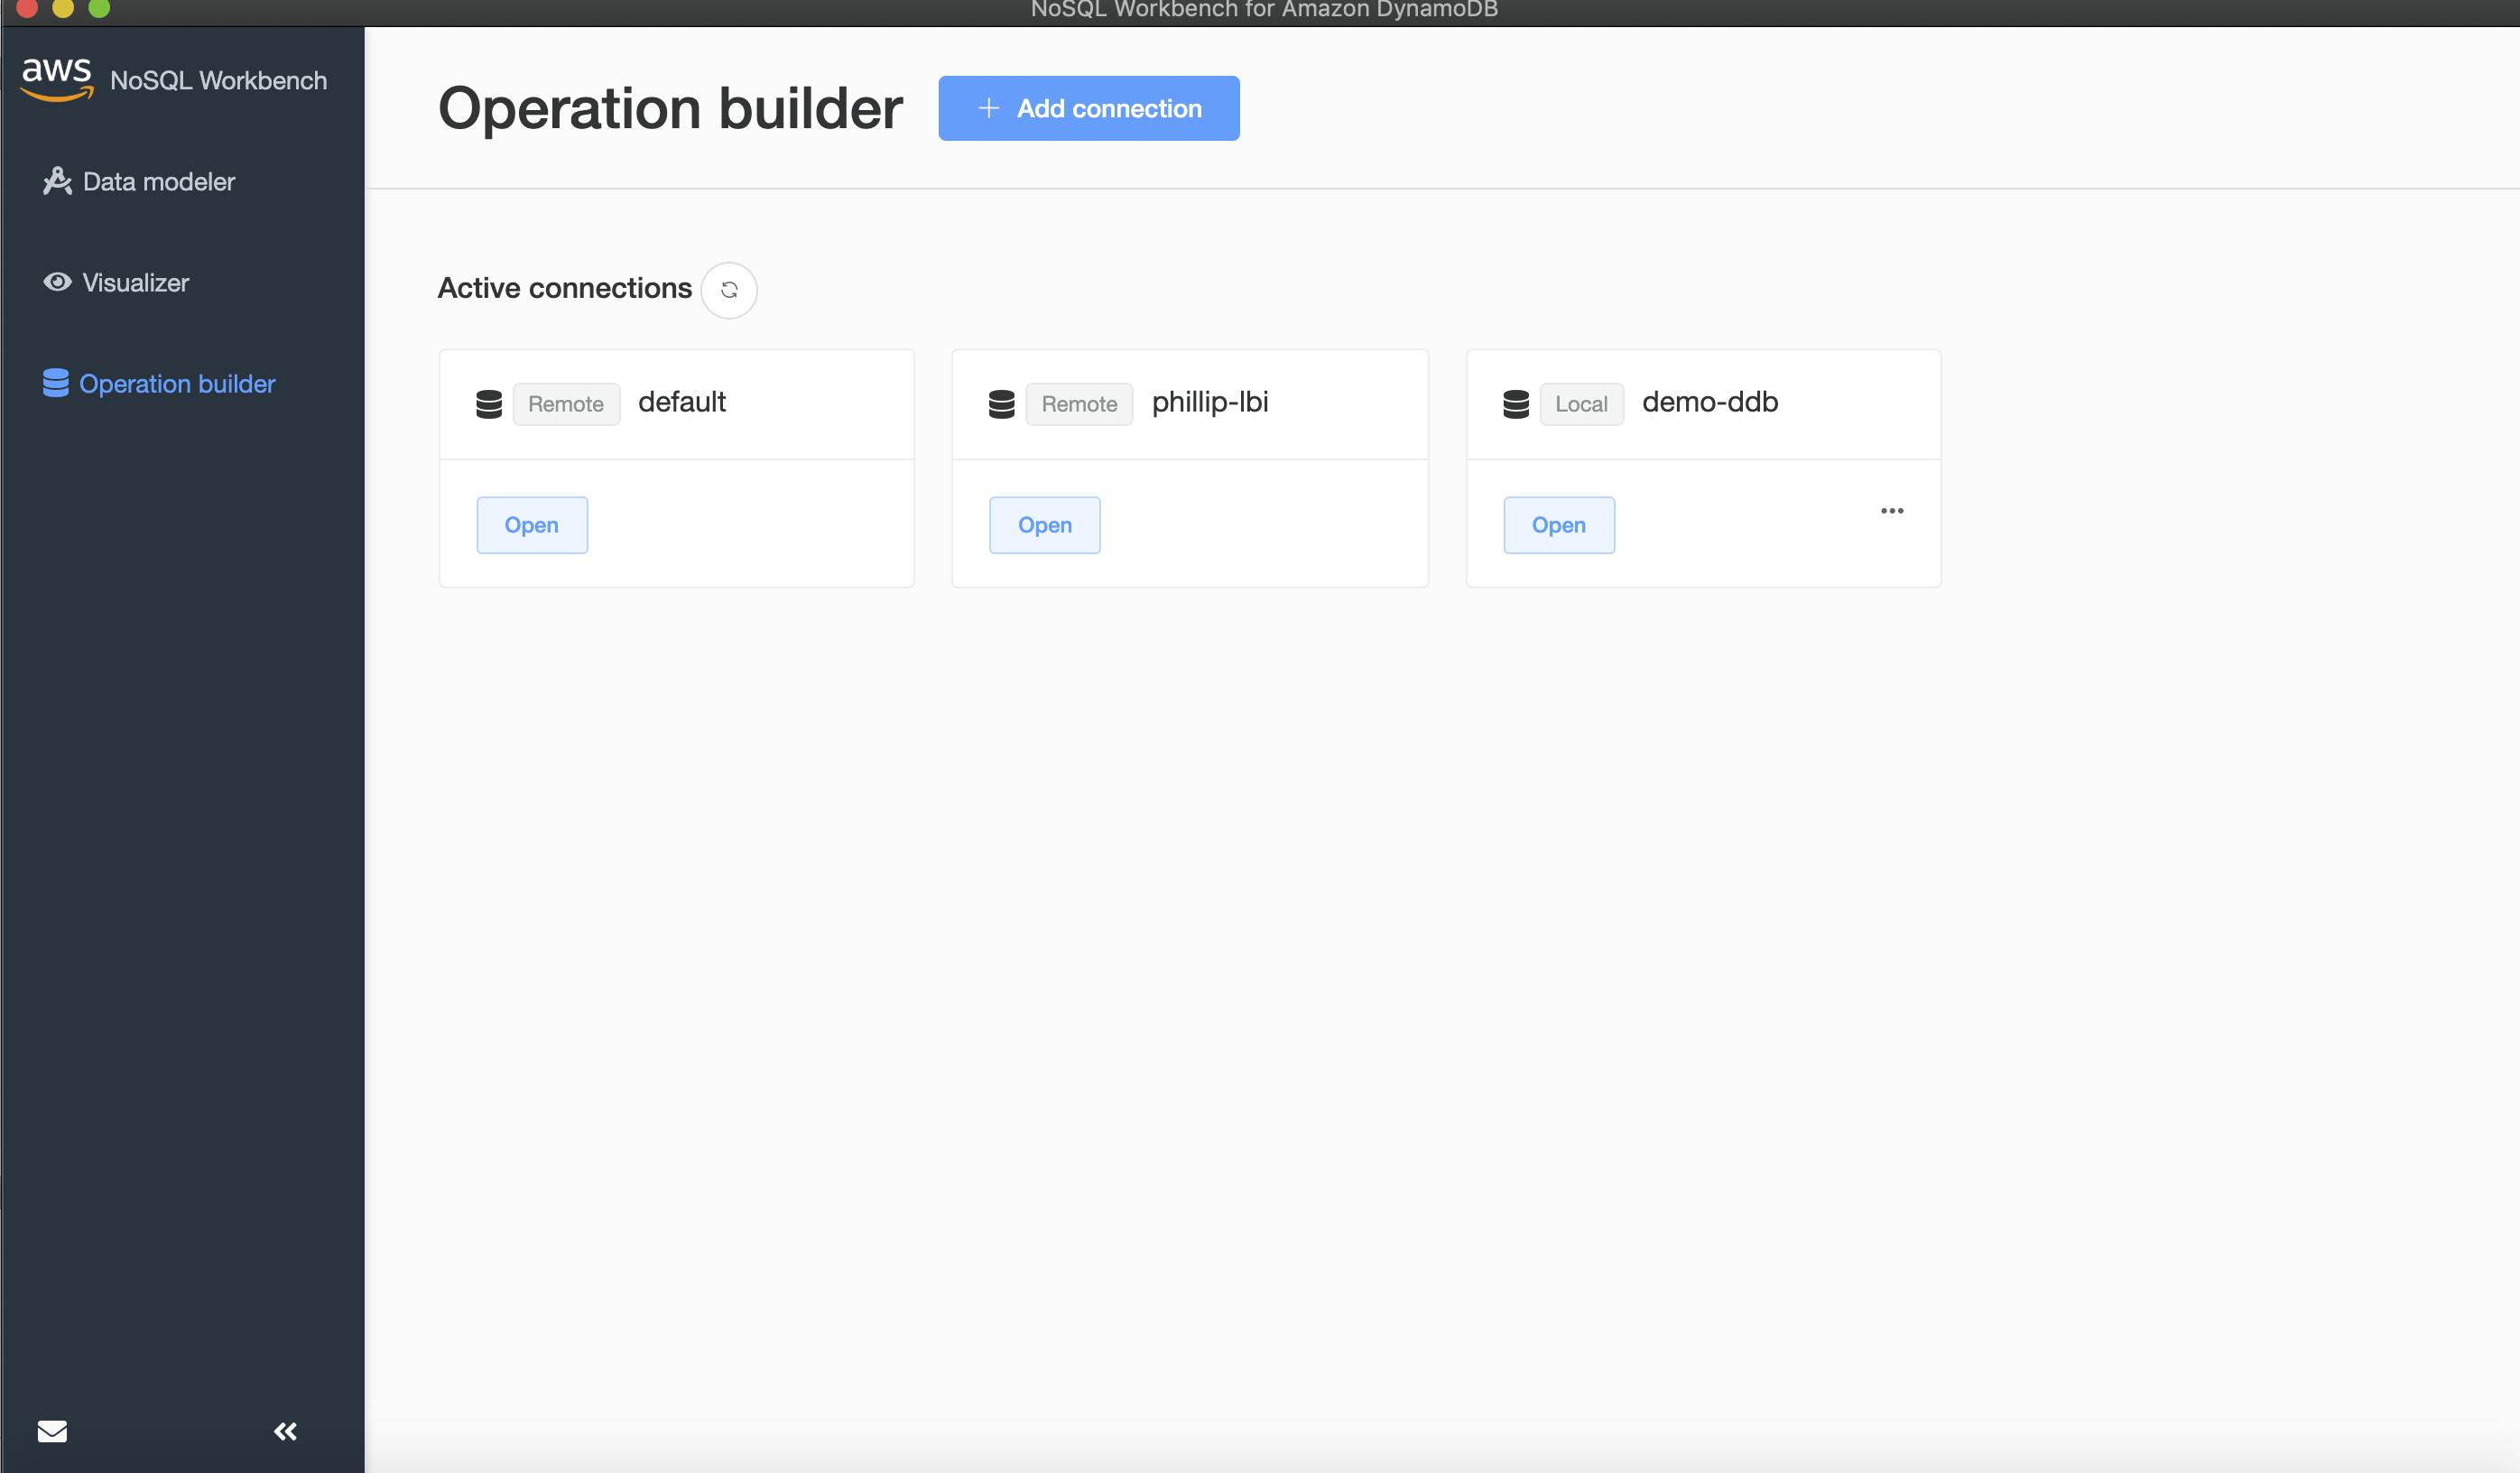
Open the connection to your local database.
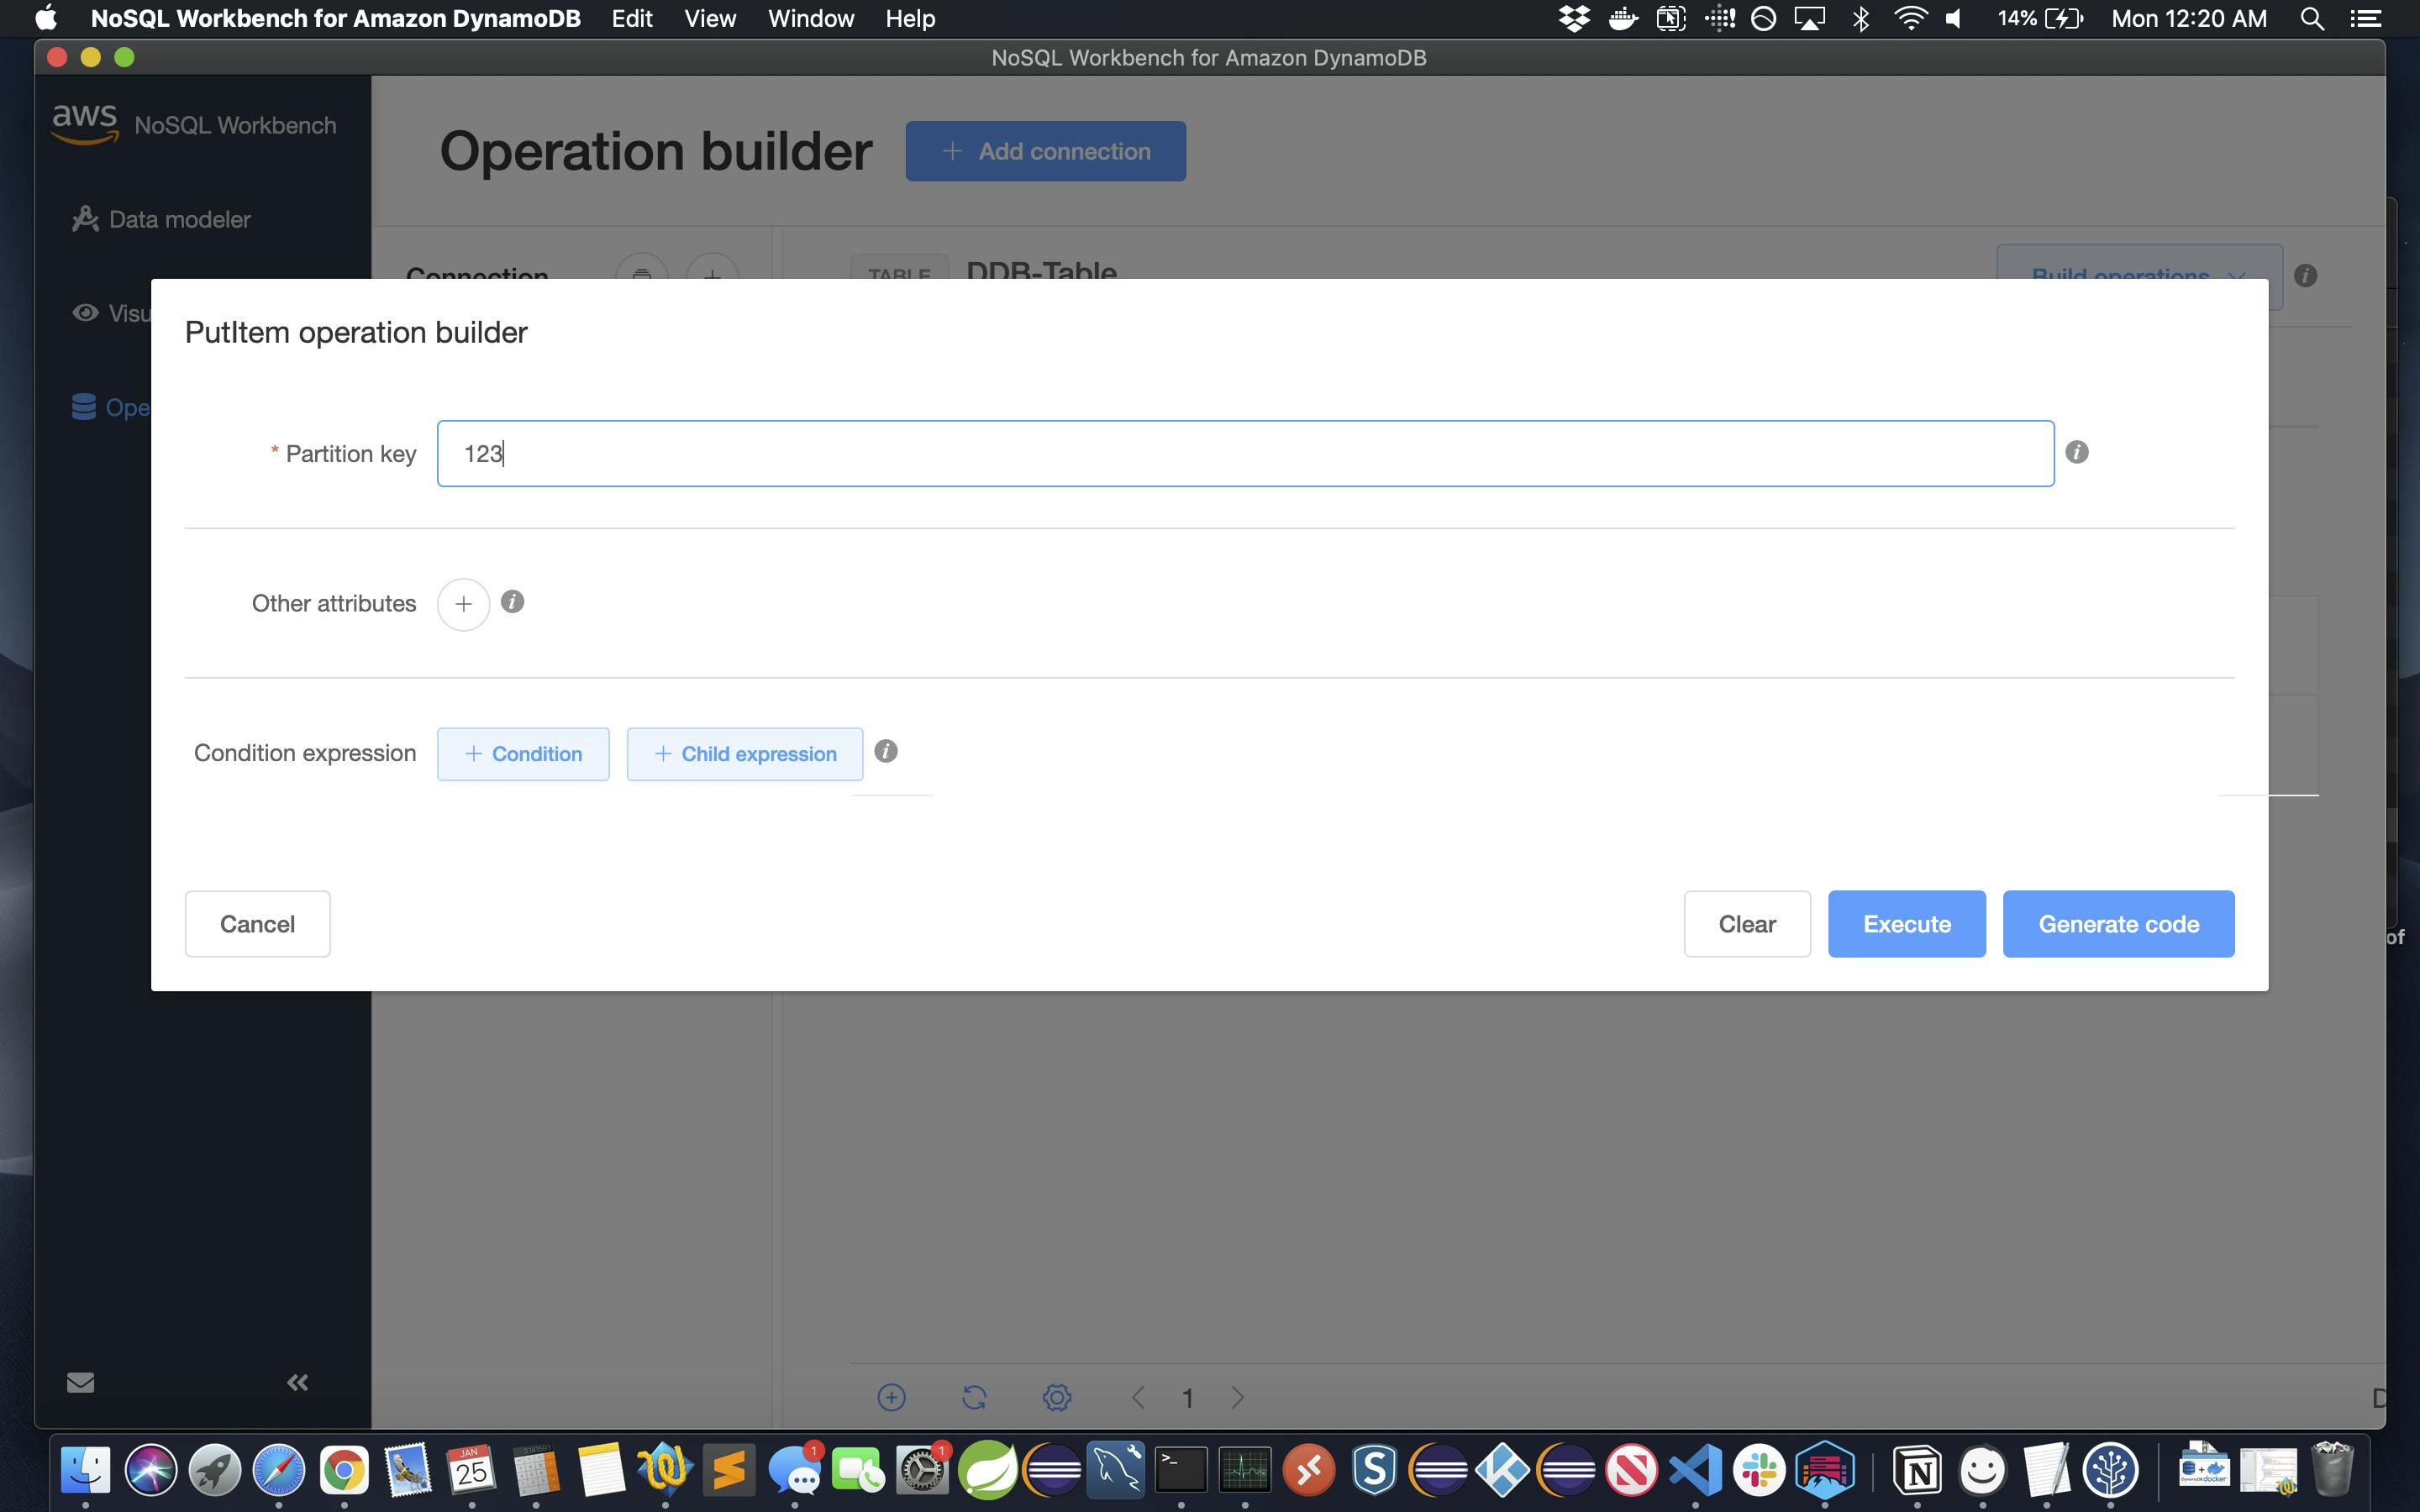
Add data to your table.
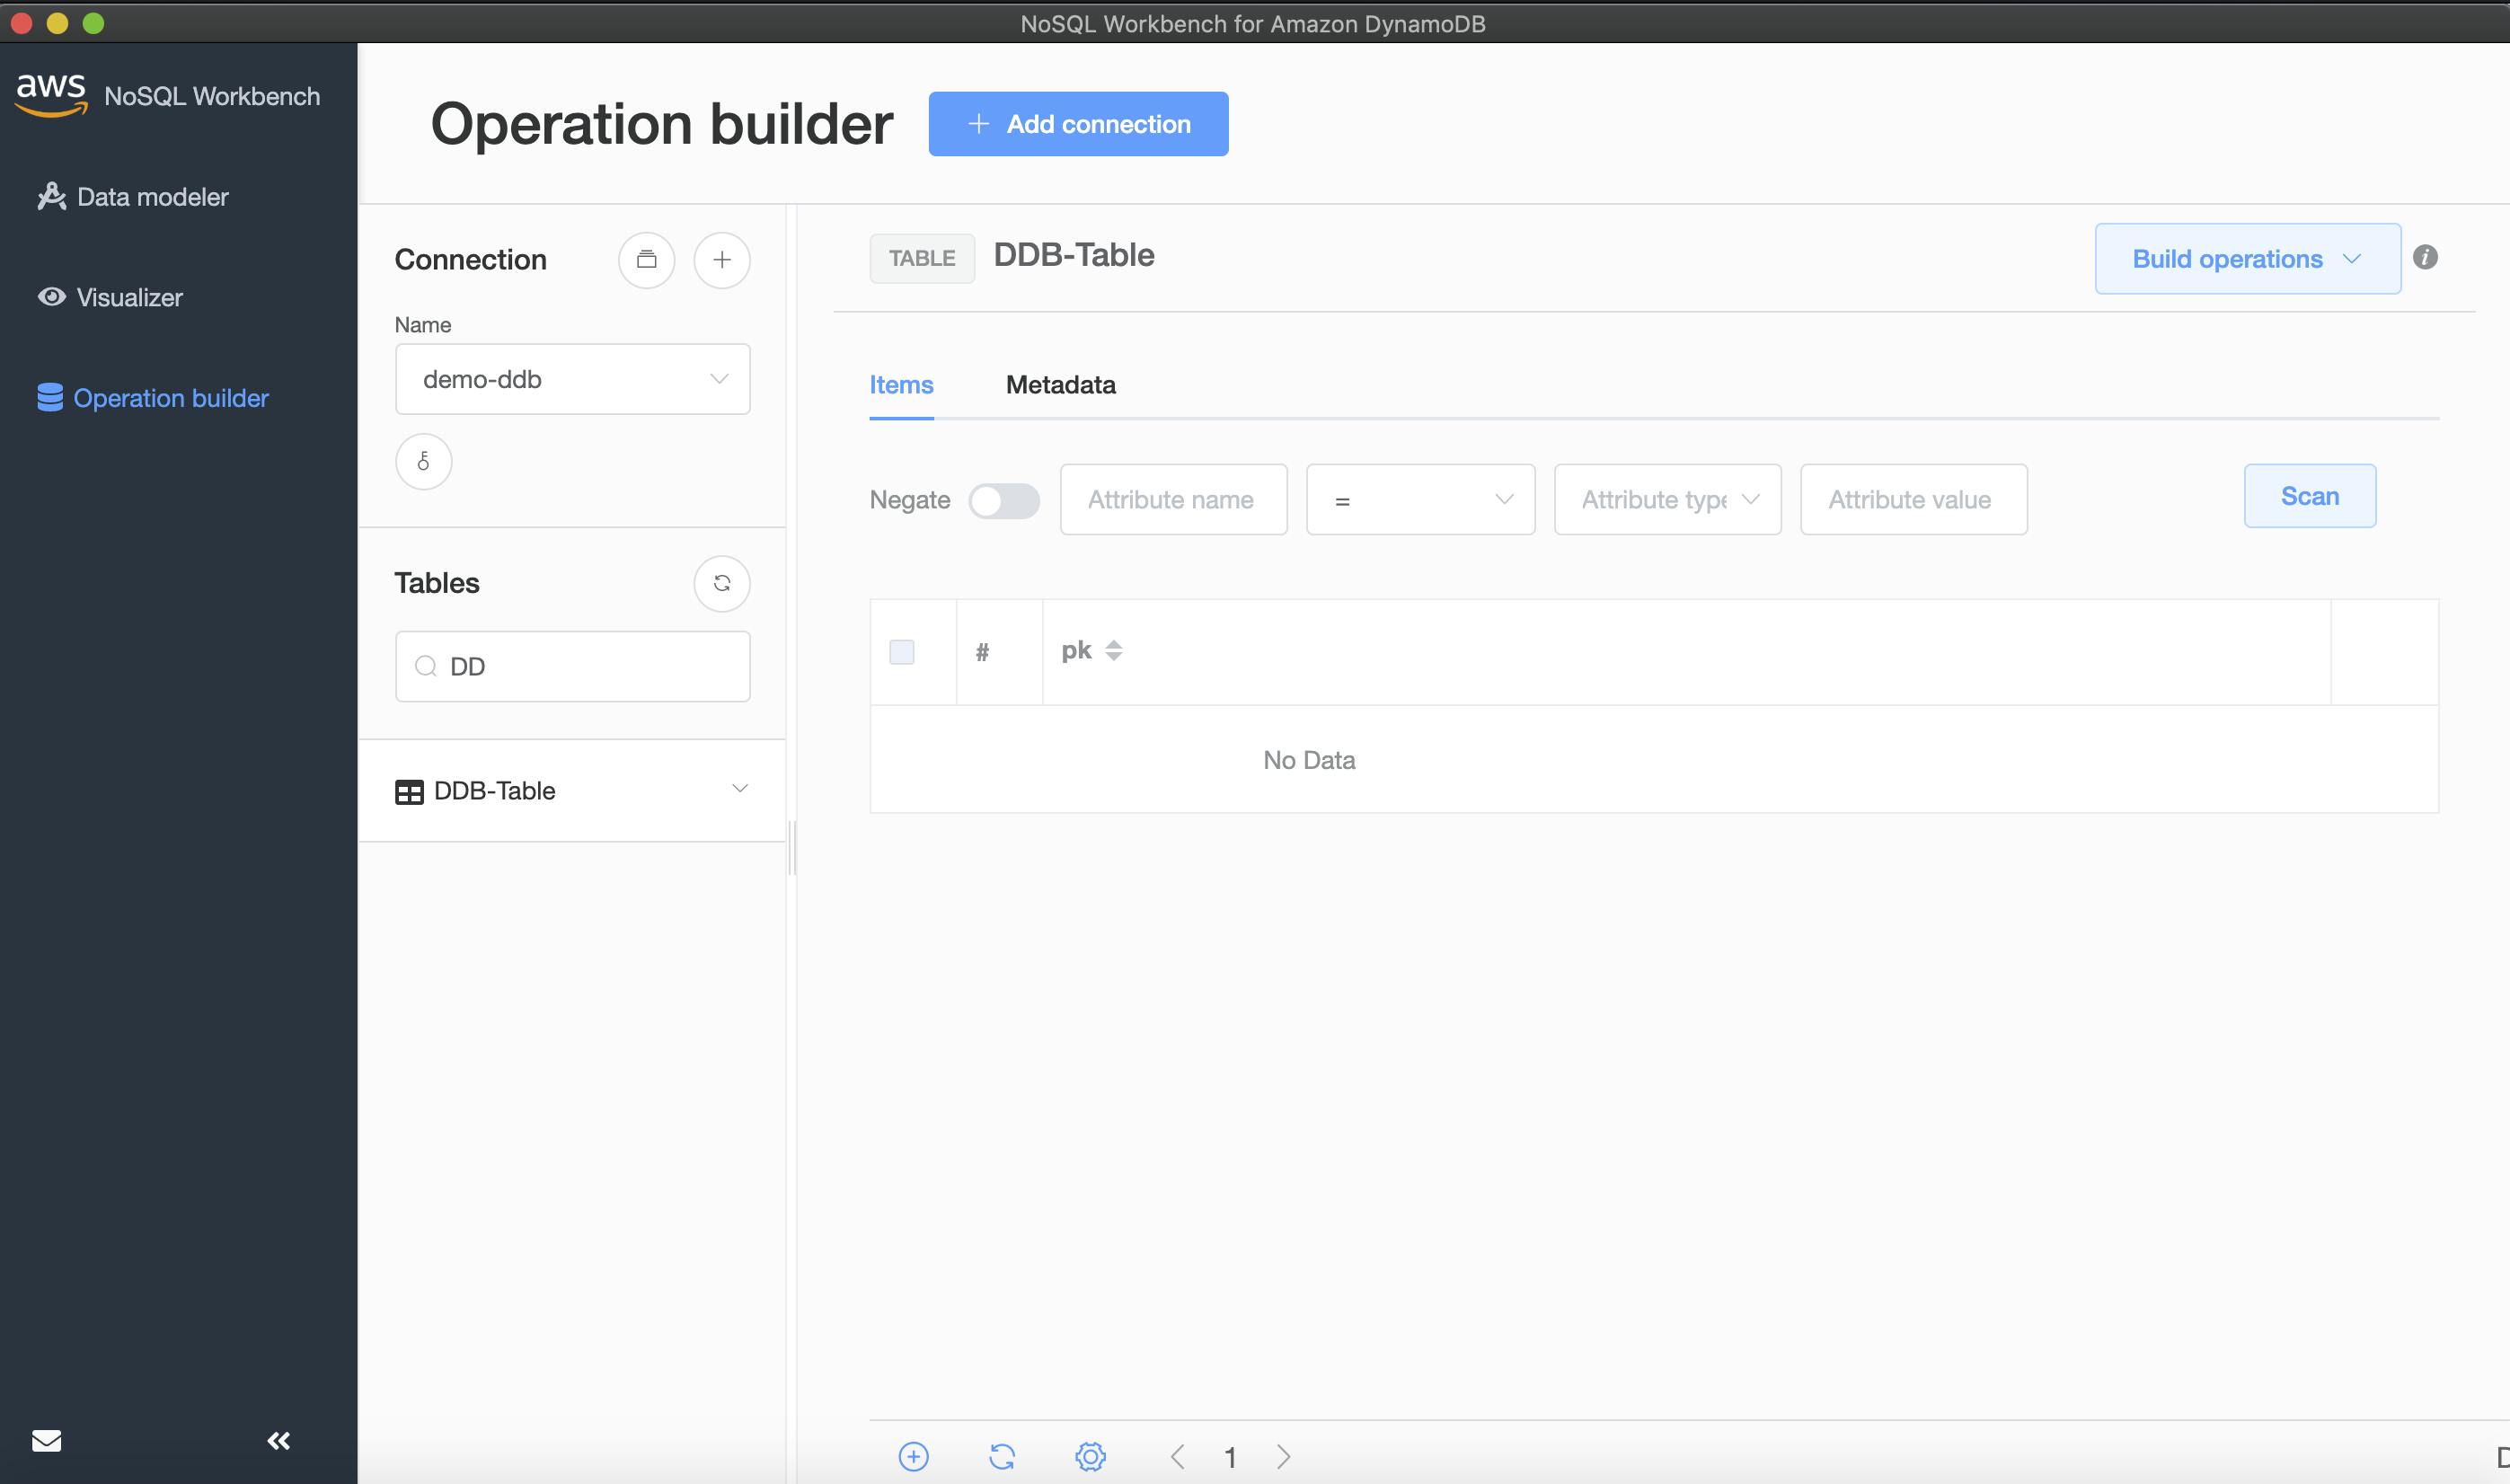
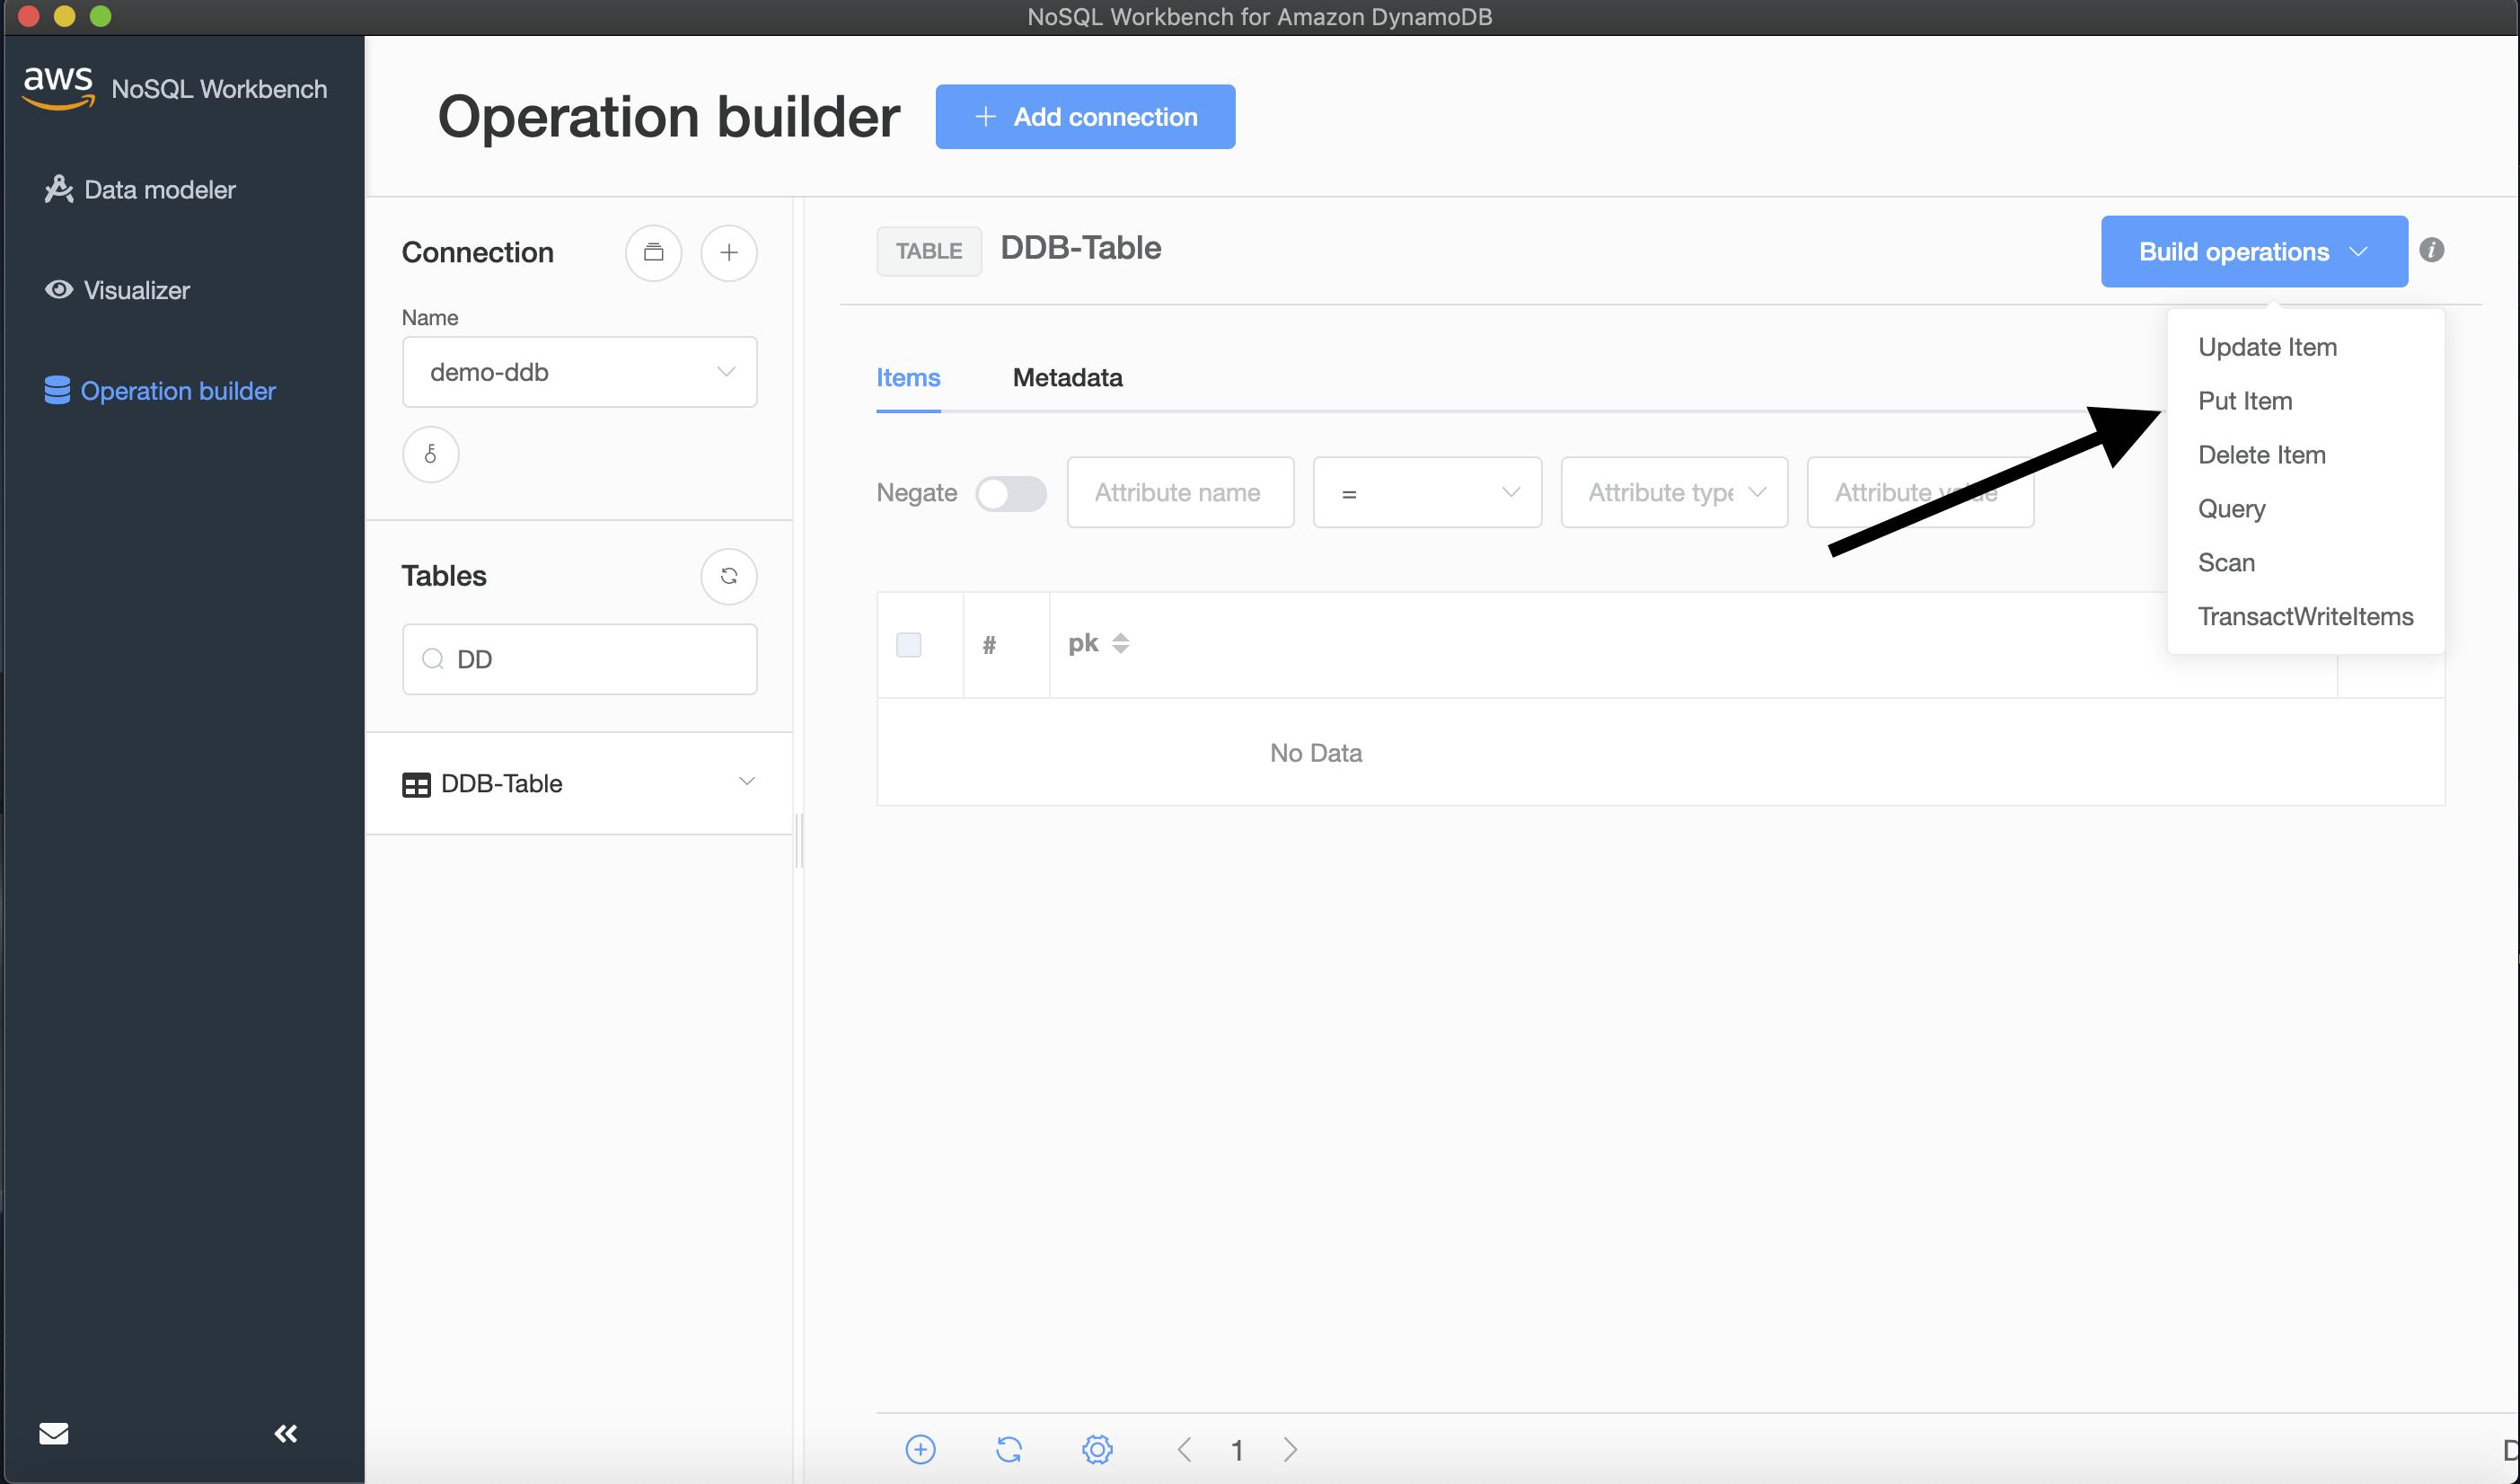
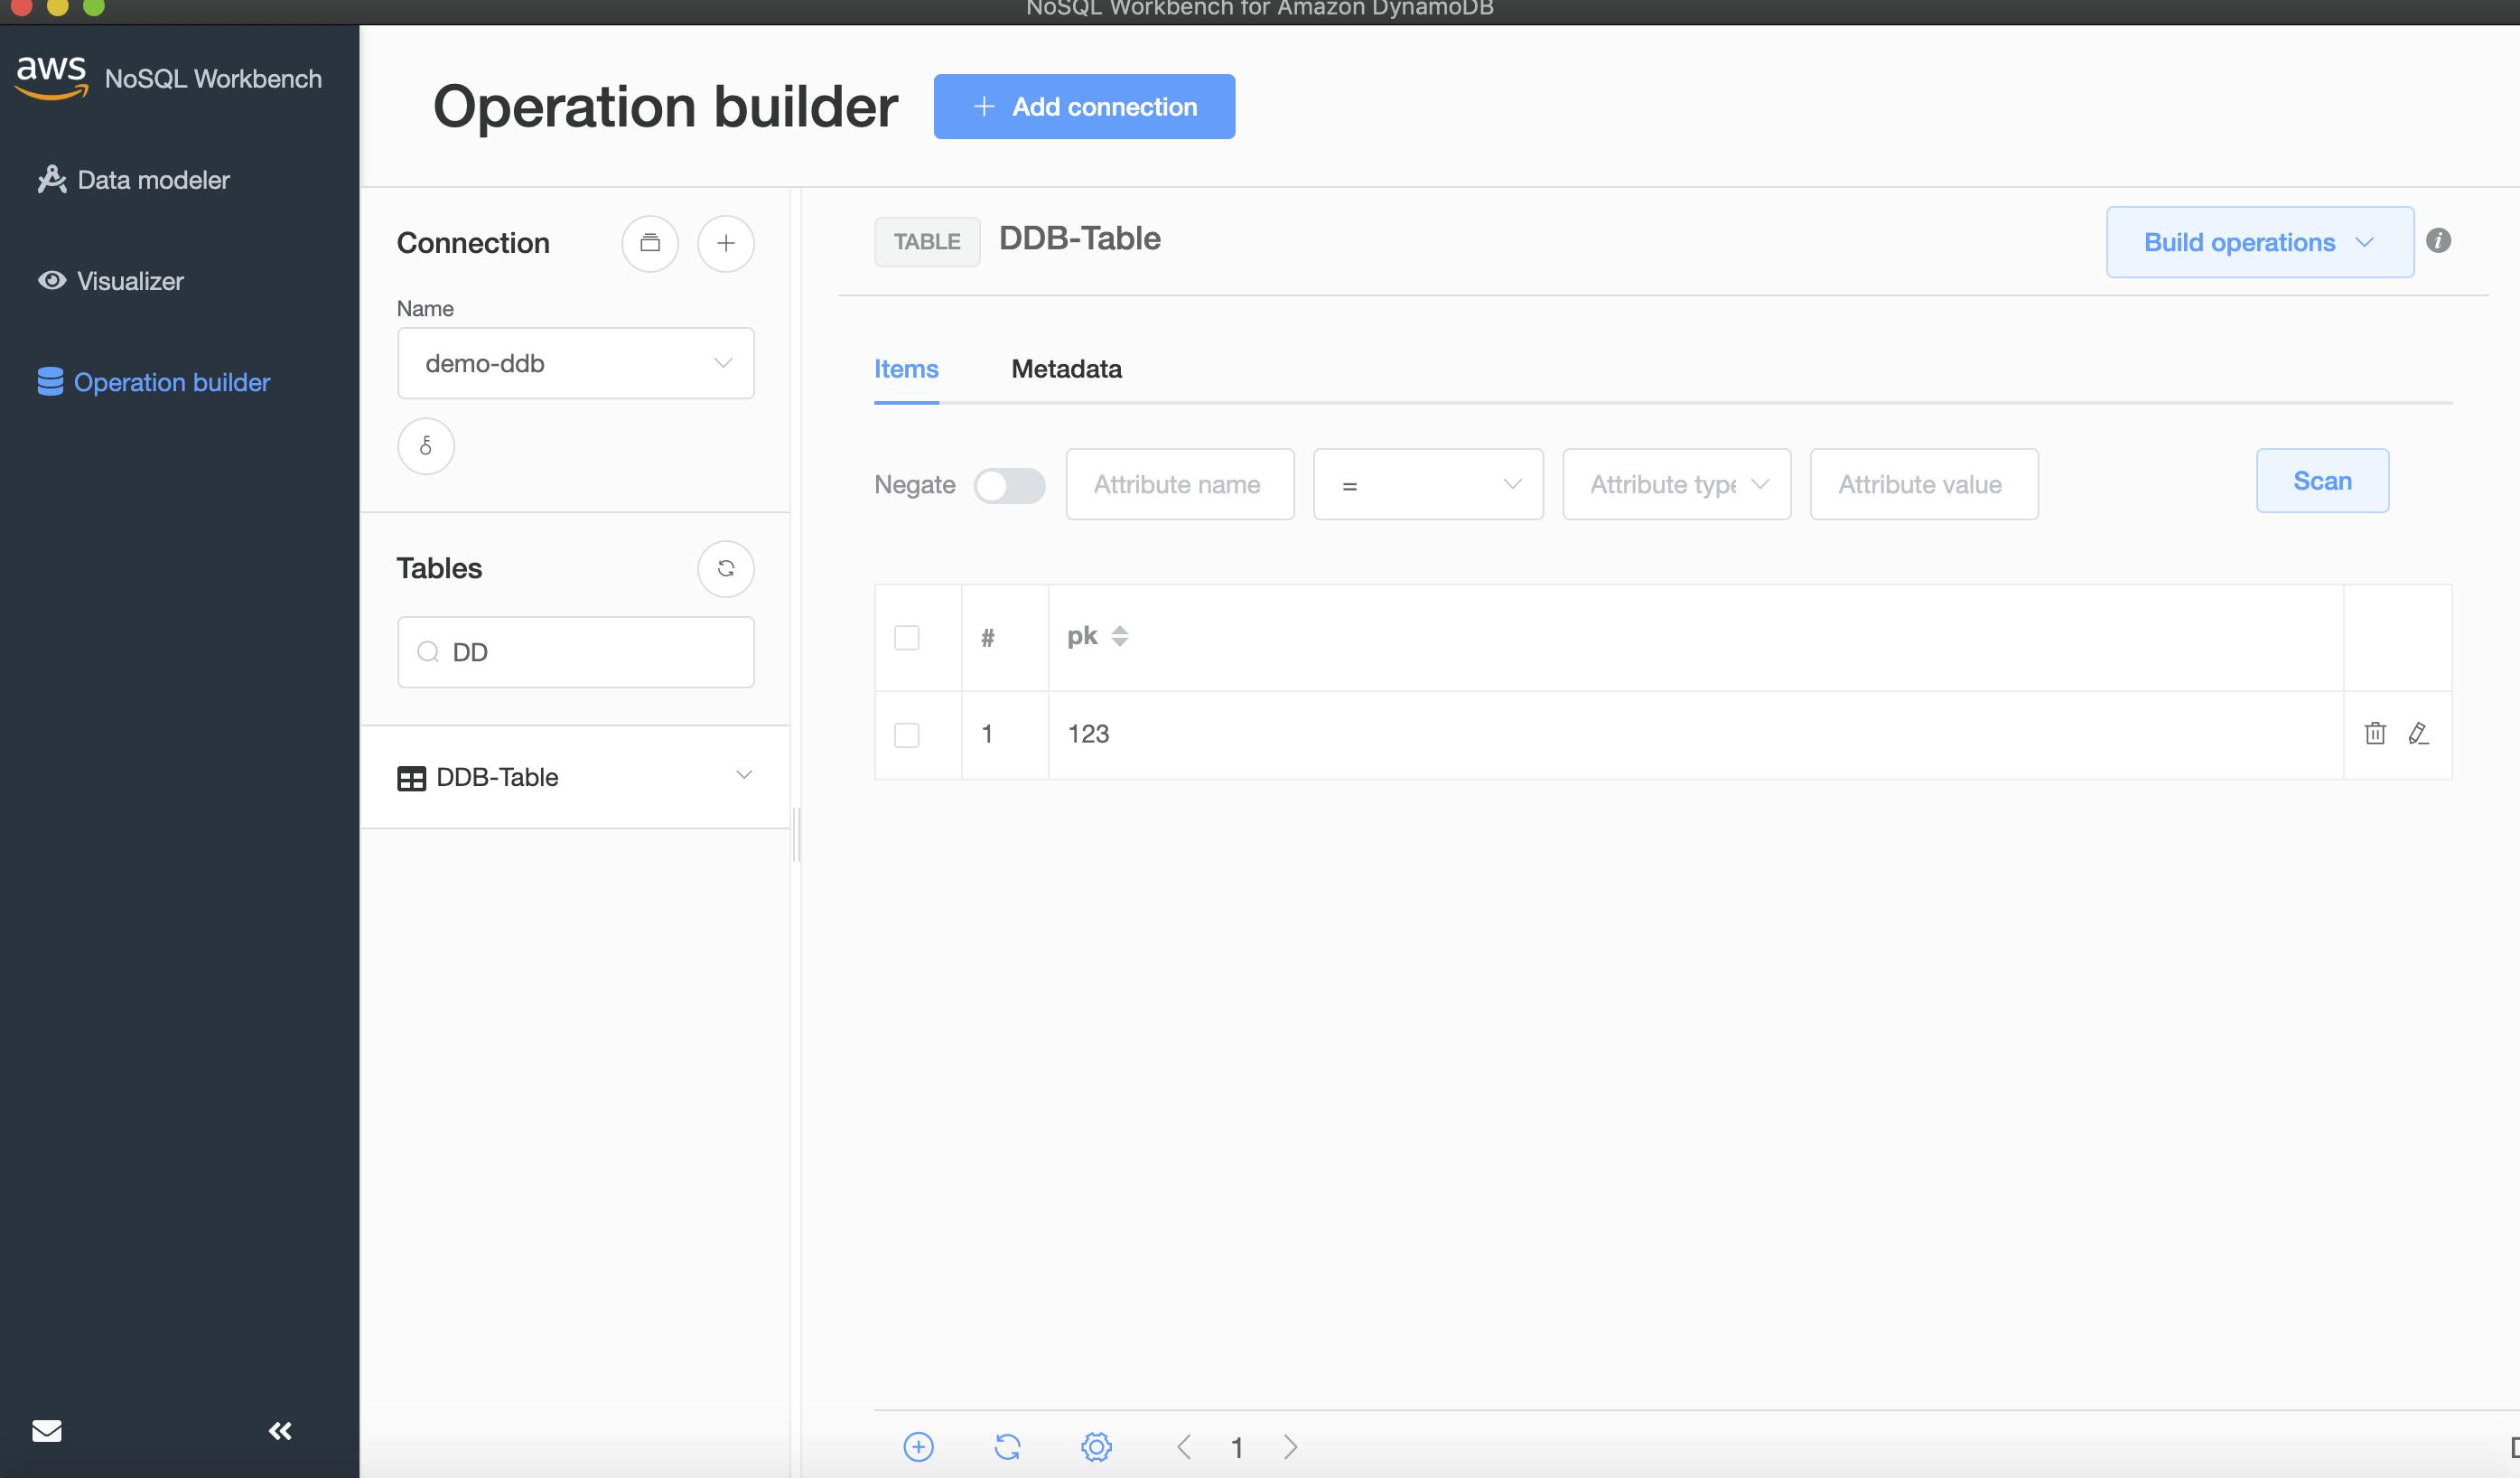
That's it! Scan your new table.
Conclusion
This should be enough information to get you started! You can toy around with adding data and preparing queries. This is a very useful tool for modeling your data and creating indexes. I will be preparing more tutorials coming soon! Enjoy -- Cheers!